Editor’s Note: This is a guest article from Erik Kennedy.
There’s a myth that the moment you have a kid, you are duty-bound to cut off contact with the outside world. Any hobbies, sports, or adventures that you participated in pre-fatherhood? Those are now over.
I detest that myth.
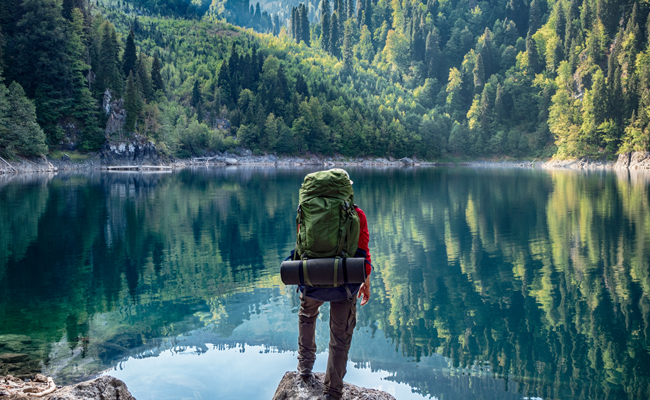
Putting together a weekend trip becomes more difficult with a child, but it’s still possible. Today we’re going to talk about backpacking with a baby. Backpacking has everything you could want from a pastime: scenic, cheap, reflective, and physically demanding. And if you’ve been backpacking with your friends or spouse, you’ll find only a few adjustments are necessary to bring your baby along.
Why bring a baby backpacking? Why cart them around on a trip they’ll never remember? I can suggest a couple reasons: First, do it because you want to go on the trip anyways. Second, even if your child never remembers the trip, they’ll see photos and hear stories someday. Perhaps my daughter will grow up to be absolutely uninterested in the outdoors. That’s fine; I can’t control that. But if she does take a liking to being in the backwoods, then she’ll feel she belongs in a particular way. She’s been doing it since before she could remember, after all.
One thing to know about carrying a baby in public is that it’s like being in a dog park with a dog — except with a baby, the dog park is the world. Anyone and everyone will feel free to approach you, make conversation, smile at your child, and so on. That camaraderie is only intensified on the trail, where people are so surprised to see an infant that it’s practically a special occasion. Don’t be surprised if you find yourself stopping to make conversation with every other passerby, and your fellow campers basically demand you let them babysit as you cook dinner.
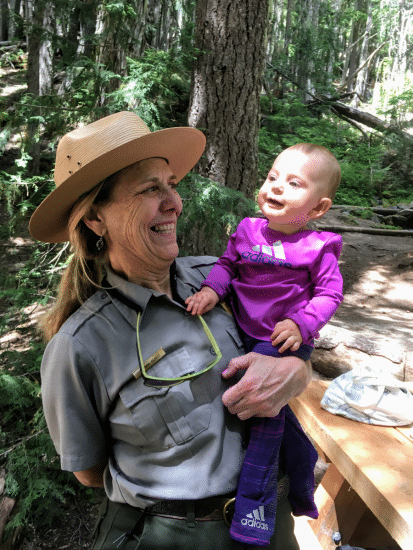
In the woods, everyone’s excited to see a baby.
My experience backpacking with a baby is somewhat limited: a 50-miler in the North Cascades (1 week), a 100-miler around Mt. Rainier (2 weeks), and a few days in Olympic National Park. If you’ve got twins, or toddlers, or anything other than a single crawling infant, this article might be a good start, but you will probably know some things that I have yet to learn.
I’ve broken down the particular things you’ll have to account for into six systems. We’ll start with the one that everyone asks about first — diapers, of course — continue through the other concerns, and finally, we’ll end with a checklist of items to bring.
1. Diapers
With diapers, you have a couple choices, depending on the length of the trip, and what’ll be available to you on the trail:
- Disposable diapers. For short trips — say, 2-3 days — the easiest option may be to take disposable diapers and pack out the dirty ones. While convenient to change, and fairly light, carrying dirty diapers for any length of time can be a pain. Because of this, while my wife and I opted to bring mostly compostable diapers (described below), we packed disposable diapers for use in the 24 hours preceding any trash can we’d pass along the trail (at ranger stations, car campgrounds, etc.). This lightened the load, and made it a bit easier than managing compostable diapers the whole time. We packed each day’s food in a separate gallon zip bag, and then used the previous day’s food bag as a trash bag, both for wrappers as well as used disposable diapers.
- Cloth diapers. This is the first instinct a lot of people have when they think of diapers on the trail, but there are some downsides. The main is that washing diaper liners in rivers or lakes pollutes them and increases the risk of transmitting pathogens like Giardia or cryptosporidium. Other options for washing them are significantly less convenient, but you could bring a collapsible bucket for a portable washstand at least 50 yards from any water source. We used no cloth diapers.
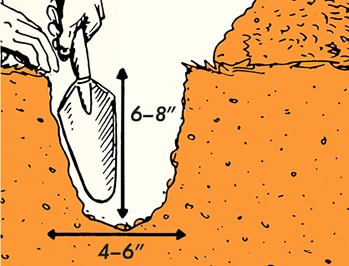
- Compostable diapers. These are the little-known secret to longer backpacking trips with a baby. Compostable diapers are a two-part system (similar to cloth diapers): inside a cloth shell lined with plastic goes a compostable inner liner. When dirty, the inner liner can be thrown into pit toilets or buried in a cathole. If the shell got wet or dirty, we found it useful to have a clothespin, which we could use to attach the diaper to a pack, from which it would dry as we hiked that day. Three shells (total) and 6 compostable liners (per day) seemed to be a good amount to bring. We used the brand G Diapers.
- Wipes. Packaged in sandwich-sized zip bags, 6 per day (extras were awesome for washing all 3 of us!).
G Diapers are a fantastic solution for any trail with pit toilets along the way.
2. Backpack
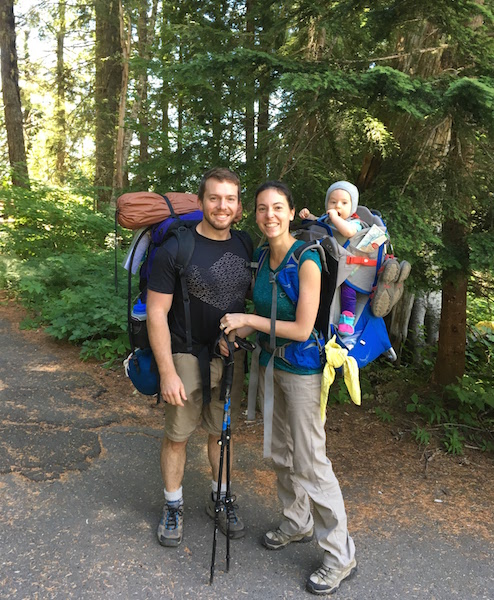
There aren’t a ton of baby-compatible backpacks out there, so your choices might be limited. The most popular, comfortable, and durable brands seem to be Osprey (this is what we used, found at a steep discount at an REI Garage Sale) and Deuter. We were happy with our choice, as it was packed with useful features, including a “convertible” sunshade and a pouch for a water bladder. Be on the lookout for what’s most highly rated and in your budget.
Another option is using a Baby Bjorn front-carrier and wearing a standard backpacking backpack. However, there’s a size constraint here: if your kid’s legs hang down low enough to impede your climbing stairs at home, don’t count on walking uphill to be much fun at all.
A few logistical pointers about carrying a baby:
- Try before you buy. Before committing to a longer trip with a baby, first take a day hike and make sure the pack fits well and feels good with weight.
- Distributing weight. The most common set-up (and the one we used) for a couple backpacking with a baby is for mom to carry baby and a few other supplies, and dad to carry the bulk of supplies. This is what we did, and it worked great. The total weight we were carrying varied a good deal depending on when our last supply drop was and how much water we had on us, but both of us topped out at about 30% of our body weight.
- Baby’s supplies. You’ll want whoever carries the baby to also carry a few baby essentials, in case you are separated. So in addition to our daughter, my wife also carried the diapers, a handkerchief, some snacks, etc. The checklist at the bottom of this article will give you an idea of what you’ll want to keep in the same pack as the baby — everything needed that day, except for items in the sleeping category.
- Rain and bugs. Consider buying a pack that has a rain cover. For a baby backpack, this will mean the front is clear plastic so baby can look out. Likewise, if bugs will be an issue on the trail, a mosquito net that fits over the top will make everyone’s life a little better.
3. Food
Here’s what we brought to feed baby (and mom), and it worked out very well:
- Breast milk. Nutritious, portable, and a source of comfort whenever the travails of backpacking weigh deeply on baby’s mind. If your wife is breastfeeding already, keeping that going through a backpacking trip is going to make things a lot smoother. However, if your kiddo is on formula, you could use powdered formula with filtered water (after checking that it’s safe with your pediatrician). You would want to make sure to bring a pot that you could sterilize your bottles in. If you’ve done this and have additional insight, let us know on Twitter or Facebook.
- Puréed fruit and vegetable packets. Although initially intended for children, little squeeze packets of puréed mixed fruits and vegetables are starting to become popular with adult backpackers. They’re portable, nutritious, and fresh tasting. Whether you want to supplement your dehydrated meals with squeeze-veggies is up to you, but we found it a great option for the little one. Bonus: if your baby will drink these straight from the tube, you don’t need to bring a spoon.
- Baby puffs/finger foods. These are a good quick snack on the trail that didn’t require the same constant attention as my daughter needs while eating messier foods. We kept these accessible at all times when we were on the trail.
- Extra food for a breastfeeding mom. Hiking all day and breastfeeding through the evening and night requires a serious calorie load.
4. Clothing
The first rule of baby clothes on a backpacking trip will be familiar to many of you: cotton kills. Cotton wicks up moisture and holds it something fierce, leeching your baby’s heat to the slightest breeze. Avoid cotton and stick to materials like polyester, fleece, and wool.
Unfortunately, finding non-cotton baby clothes can be surprisingly difficult. Most brand-name sports retailers will offer baby clothes, but their prices are often brand-name too. We had the most luck searching Amazon for baby athletic clothes (it might make sense why there’s not a lot of results for this).
Synthetic shirts and pants make a great base layer — light, non-wicking, and protective from the sun. A sunhat is extra protection for the less shaded stretches of trail. Between a long shirt, a sunhat, and the sunshade built into the pack, we were able to forego sunscreen for our baby — a boon, considering it would’ve ended up in her mouth in short order.
For mornings, colder days, and high-elevation stretches, pack warmer clothes. Fleece booties and a thin wool hat are good for the in-between temperatures, but if it’s truly chilly, nothing beats a one-piece full bodysuit, either in fleece or other synthetics.
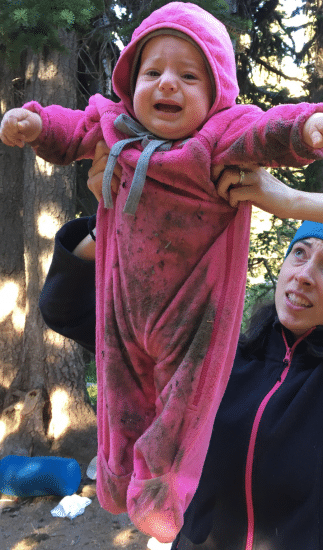
A one-piece fleece suit is great for cold mornings — although it occasionally will pick up a bit of dirt if you have a crawler.
For sleeping, standard one-piece pajamas work great — but, not to beat a dead horse, do use fleece instead of cotton.
And then there’s rain. While a rain cover that fits your baby backpack will be good first protection, there’s always the chance that it’s raining when you’re in camp, taking a break, or sometime when the pack doesn’t make sense. For those, you can get one-piece zippered baby rain suits.
For a full list of baby clothing to bring, see the checklist below.
5. Sleeping
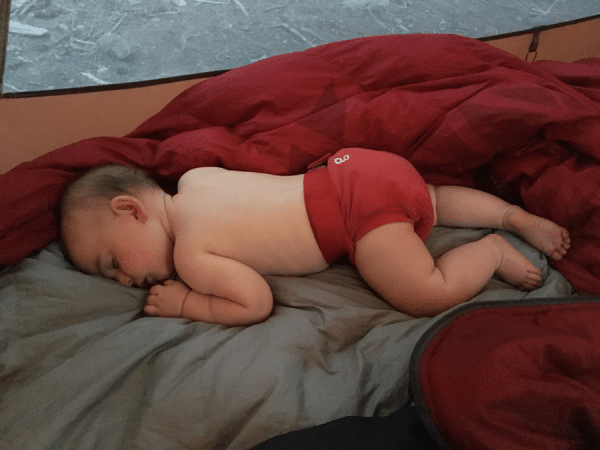
Sleep was the most difficult part of our trips — our daughter just doesn’t sleep well in tents.
In some sense, who can blame her? We were in a totally new place, in a tent with backlit orange walls, it was far lighter in the evening, brighter earlier, and the sleeping bag she was on was totally different in texture and softness from her crib at home.
It is a challenge to create an ideal sleep environment for a child in the backcountry. As much as you can, replicate your child’s sleep environment at home. Now is not the time to take away the white noise machine. We specifically brought a receiving blanket that my wife had wrapped her pillow in the nights before we left — here was something that felt and smelled like home for our daughter, and she would often fall asleep on it at the beginning of the night.
Then there’s the question of space. Where does baby sleep? In general, there are two viable options: above one of your heads, or next to you/in between you.
If your baby sleeps at your head, you can either use an extra-long sleeping pad, get a separate small sleeping pad (such as a pet sleeping pad), or — what we did — put together two 3/4 length backpacking sleeping pads. This spanned our tent the long way, and I had enough room to stretch out with my daughter at my head.
If you sleep with your baby between you or on one side of you, then some different options open up. First, if your pads are wide enough, you might have enough room for the three of you on two pads (we often ended up like this by morning — sometimes tight, but certainly doable). Alternatively, consider a multi-person sleeping pad system designed for the job.
When the temperature was in the 50s during the night, we found fleece pajamas and a wool hat was plenty warm. When colder, we also put her in a one-piece fleece suit or snuggled her up to us. With your baby so close to you, it’s not hard to monitor their temperature and adjust accordingly.
In the checklist below, I’ve also added a baby tent into the sleeping system list. Some companies offer small, zippable tents for babies, targeted primarily at families bringing babies to the beach. We bought one hoping to use it as a crib, but found it worked better as “container care” when we were setting up camp and needed four hands to pitch the tent, filter water, make dinner, etc.
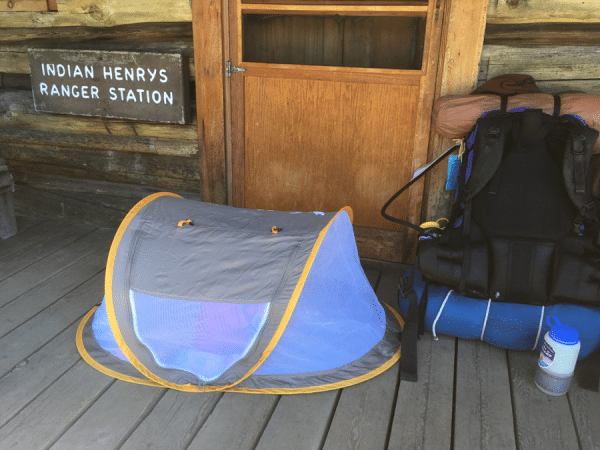
Our Kilofly baby tent was great for breaks and making camp.
6. First Aid
One of the biggest concerns bringing a baby into the backcountry is safety. What if something goes wrong? You can’t eliminate every risk, but you can stack the odds in your favor with preparation and knowledge.
- Have — and know how to use — everything in a normal backpacking first aid kit
- Get trained in infant CPR and First Aid or Wilderness First Aid (my wife is trained in the former two, myself in the latter)
- Bring a GPS sat phone/emergency beacon. We used a Garmin, and were able to send messages out to family and friends when we had camped safely each night. In addition, it has an SOS function that would call emergency services by satellite phone in case something went drastically wrong.
- There are a few items that you should add to your first aid kit if you have a baby on board — you can find those on the checklist below.
Of course, none of this is medical advice. Talk to your pediatrician before taking your child on a backpacking trip.
The Backpacking Baby Checklists
These are not meant to be an exhaustive catalog of contingencies, but rather a start to your planning and packing process. Where you go, when you go, how long you go for, and who you go with, and how old your child is will all change what you want to pack. Take a smaller trip to test out your systems before going on a full excursion, and stay sharp out there.
Diaper System
- 2-3 compostable-compatible diaper shells
- Compostable diaper liners (6 per day)
- 2 clothespins (for hanging compostable diaper shells to dry)
- Disposable diapers (for the 24 hours before access to a trash can)
- Gallon zip bags (for carrying dirty disposable diapers; may double as food bags)
- Wipes
Backpack System
- Baby-compatible backpack
- Rain cover (e.g. open or clear plastic front)
- Mosquito cover
Food System
- Formula (if not breastfeeding)
- Puréed fruit and veggie pouches
- Puffs; fruit snacks; finger food
- Handkerchief
- Spoon (if necessary to feed puréed food)
- Extra food for breastfeeding mom
Clothing System
- Non-cotton (spandex, polyester) long shirt and long pants
- Non-cotton short-sleeve shirt or onesie
- Wool or fleece hat
- Sun hat
- Fleece booties
- Zippered fleece pajamas
- One-piece full-body fleece suit
- One-piece zippered rain suit
Sleeping System
- Portable white noise machine (if used at home)
- Cotton receiving blanket (similar feel, smell to crib at home)
- Extra-long sleeping pad or pet sleeping pad (for baby sleeping above you)
- Multi-person sleeping pad (for co-sleeping arrangement)
- Baby tent
First Aid System
- Baby pain relief (Tylenol or other acetaminophen product)
- Thermometer
- Diaper cream
- GPS emergency beacon
_____________________
Erik Kennedy is a freelance UX/UI designer who likes to take advantage of all the unpaid vacation to get outdoors. He teaches a course on user interface design at http://learnui.design.