The decision to move someone who is injured is always a last resort. In most cases, as long as they are in a stable, safe position, it’s best to wait for emergency medical teams to arrive and administer treatment, especially when injuries concern the neck or spine. If you must move someone to get them out of danger, such as away from a fire, or if they must be moved to reach medical services, a sturdy stretcher is the best way to keep a person stable and free from further injury. The key to any improvised stretcher is to make it rigid, durable, easy to carry, and as comfortable as possible. Fortunately, stretchers can be made of a wide variety of materials you might be carrying with you or that you can source from the immediate environment.
Below we offer illustrated diagrams of the basic anatomy of an improvised stretcher, along with 4 variations you can make, depending on what supplies you have at hand.
The Basic Anatomy of an Improvised Stretcher
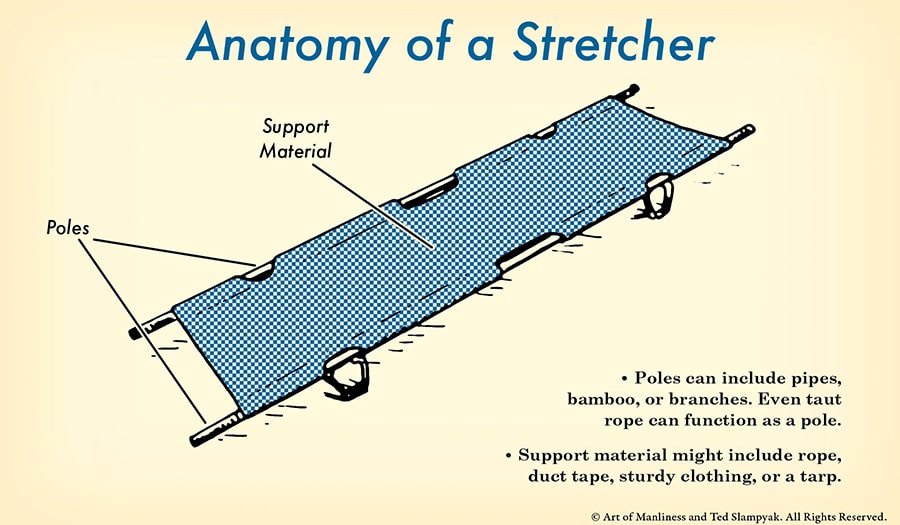
While stretcher materials can change depending on what you have available in the moment, the basic anatomy and construction remains fairly similar (although as we’ll see below the techniques for getting there can vary). You’ll generally have two rigid poles, longer than the victim so that their whole body lies on the stretcher. Between the poles, you’ll have some sort of sturdy support material that will be tautly secured so that there’s no risk of it breaking.
4 Ways to Make an Improvised Stretcher
Rope Stretcher
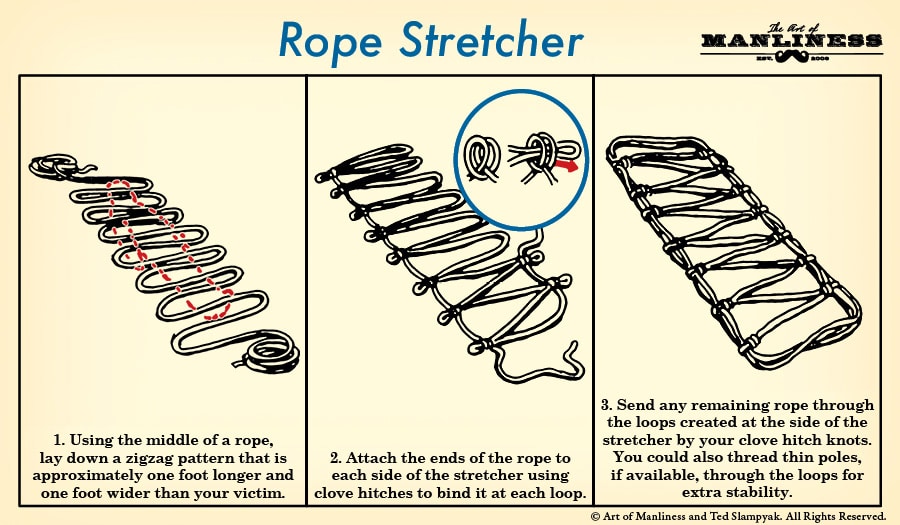
1. Using the middle of a rope, lay down a zigzag pattern that is approximately one foot longer and one foot wider than your victim.
2. Attach the ends of the rope to each side of the stretcher using clove hitches to bind it at each loop.
3. Send any remaining rope through the loops created at the side of the stretcher by your clove hitch knots. You could also thread thin poles, if available, through the loops for extra stability.
Tarp Stretcher
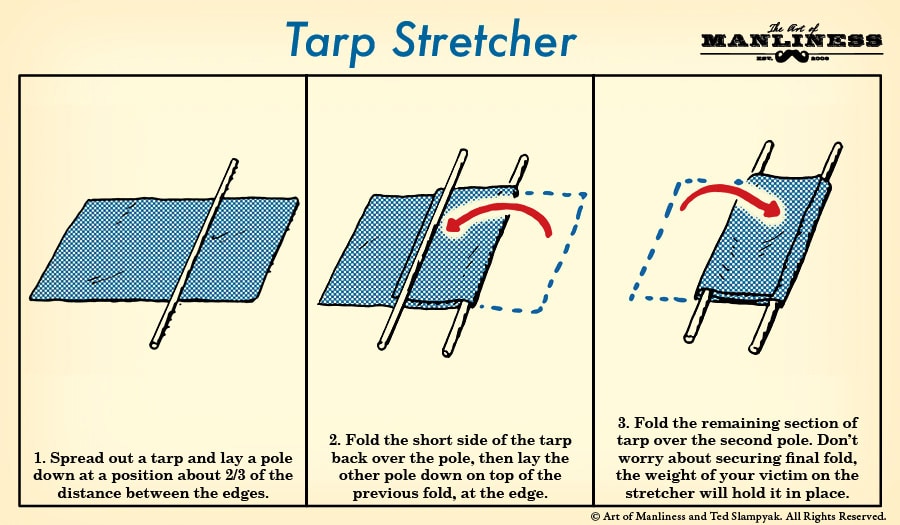
- Spread out a tarp and lay a pole down at a position about 2/3 of the distance between the edges.
- Fold the short side of the tarp back over the pole, then lay the other pole down on the top of the previous fold, at the edge.
- Fold the remaining section of tarp over the second pole. Don’t worry about securing final fold, the weight of your victim on the stretcher will hold it in place.
Duct Tape Stretcher
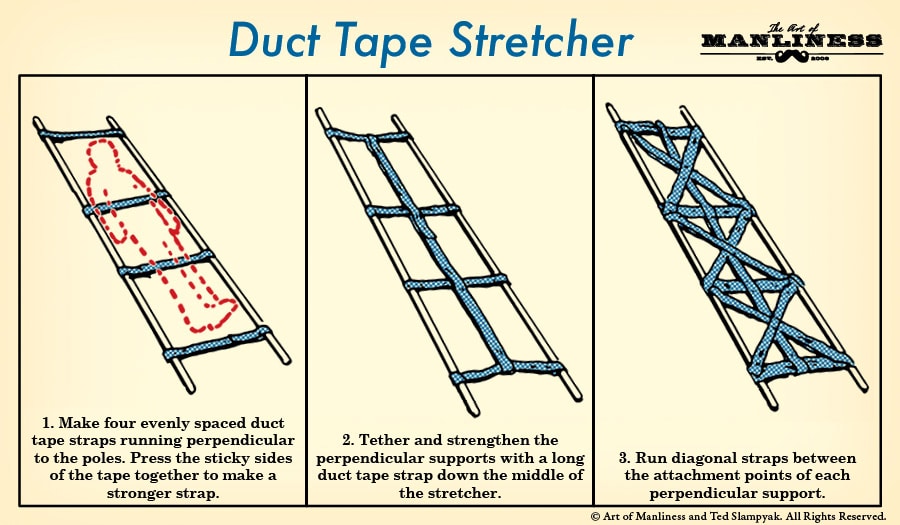
- Make four evenly spaced duct tape straps running perpendicular to the poles. Press the sticky sides of the tape together to make a stronger strap.
- Tether and strengthen the perpendicular support with a long duct strap down the middle of the stretcher.
- Run diagonal straps between the attachment points od each perpendicular support.
Jacket Stretcher
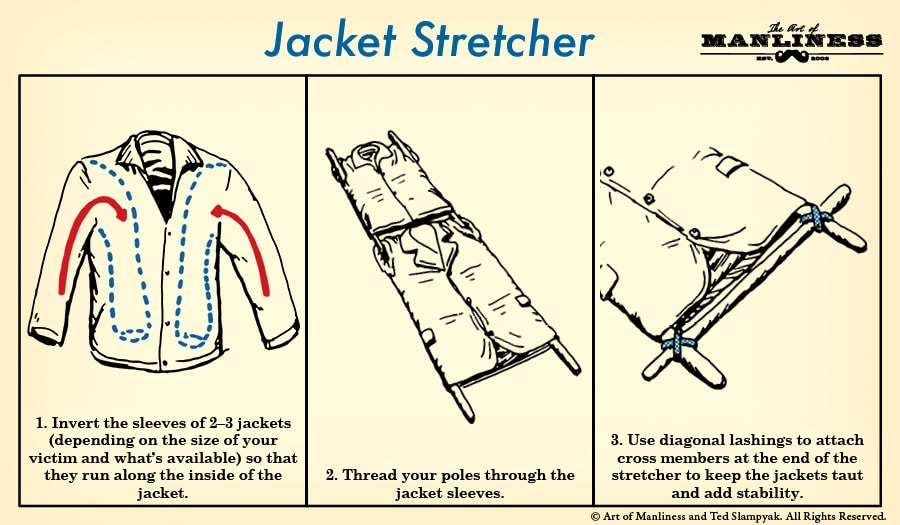
1. Invert the sleeves of 2-3 jackets (depending on the size of your victim and what’s available) so that they run along the inside of the jacket.
2. Thread your poles through the jacket sleeves.
3. Use diagonal lashings to attach cross members at the end of the stretcher to keep the jacket taut and add stability.
Like this illustrated guide? Then you’re going to love our book The Illustrated Art of Manliness! Pick up a copy on Amazon.