If you’re trying to make a good first impression with your place, know that nothing says sterile and boring like blank walls. A few pieces of manly art or virile photos hung and displayed tastefully will liven things up and give you a chance to show some of that stellar personality of yours. And even if you don’t much care for wall art yourself, your significant other likely does; being asked to hang something up may be perhaps the world’s most common “honey-do.” Can you, ahem, nail this task?
While not necessarily an exact science, knowing some basics about wall hangings, and where to place prints on the wall, will ensure that your home has charm that will knock the socks off visiting dates and parents, and greatly please your main squeeze.
All of this is much easier with two people, so grab your best gal or pal, and get to it!
Choose Your Method
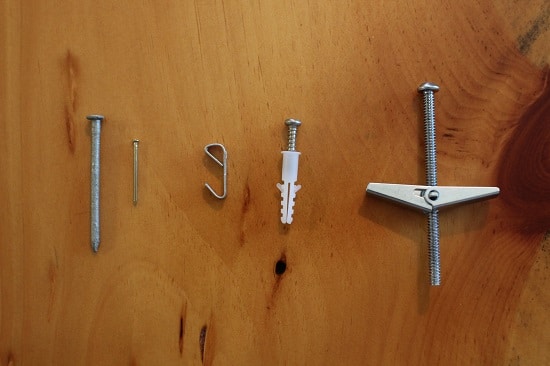
From left to right: nails, picture hook, wall plug anchor, toggle bolt anchor.
Before hanging a picture, you have to choose how you’re going to hang it. This is predicated mainly on three things: size/weight of the picture, the hanging options present on the picture (i.e. wire, ring, sawtooth hanger, etc.), and wall material.
For most prints and most walls, standard nails or picture hanging hooks work just fine. Many experts recommend using anchors when putting any print on drywall with no stud, but honestly, I’ve hung tons of pictures with just nails, and I’ve never had an issue. Another newer option is the Monkey Hook; no tools needed, you just push it into the wall and the large hook sits on the back of the drywall, securing it in place. I’ve not personally used these, but have heard excellent reviews.
For small prints, one nail/hook will often do the trick; for medium-sized prints you might be able to get away with just one, but using two nails/hooks will be more secure and more likely to stay centered
For large prints or especially heavy frames, this is when you’ll want to use some kind of anchor if going into drywall with no stud. There are two primary types: plastic wall plugs and heavy-duty toggle bolts. Toggle bolts certainly carry the most load capacity, but also do the most damage to your wall, as you need to drill a good-sized hole first. If the placement of your heavy print lines up with a stud (the 2x4s in the wall, found with a stud finder), a heavy-duty nail often does the trick.
For canvas prints, and other very lightweight prints, you can even use 3M poster hangers that utilize either plastic hooks or velcro strips, and come with the benefit of not marring your walls. I also use these when hanging images on brick walls — much easier than drilling into it.
Picking the Perfect Placement
Choosing where exactly to hang your picture is one of the most commonly flubbed parts of this task. You first need to decide on which wall or space your image is going to be hung. In that space you’ll want to measure across to find the center, and mark it with pencil or painter’s tape.
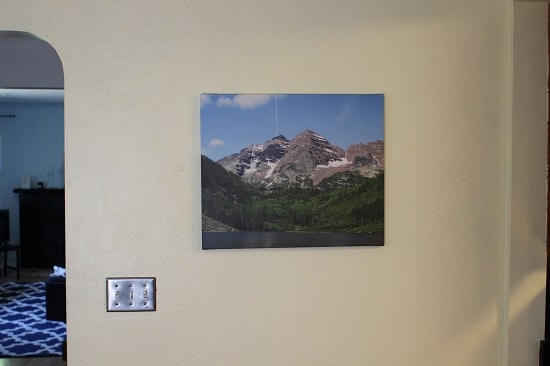
You then need to decide how high the print will be on the wall, which is where many people go wrong. As a general rule, the middle of the print should be at about eye level. Obviously everyone’s eye level is different, so for the sake of ease, most experts call that 60-65 inches. Mark this as well, and when matched up with your horizontal halfway point, you’ll know right where the center of your print should be.
If You’re Doing a Gallery Wall
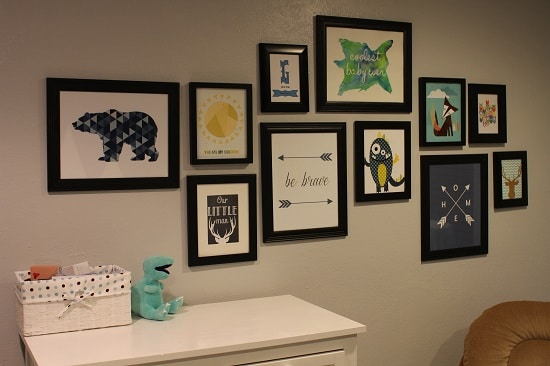
The gallery wall in our little boy’s nursery. You’ll notice that for the most part, we spaced the frames out evenly from each other. There are some exceptions where a certain frame didn’t cooperate, but this method allows for creativity in crafting the ultimate shape of your gallery. While not centered horizontally on the wall, the middle line vertically is right at eye level.
The nice thing about a gallery wall is that it offers a little more room for creativity; the hard part is that you’re tasked with precisely hanging multiple prints so that it looks pulled together. Experts recommend treating the entire gallery as a single print when deciding on wall placement. This is more true for height than for width; while you do want the middle of your “unit” to be about eye-level, galleries don’t necessarily have to be centered horizontally if you’re going for some creative flair.
Galleries (or any arrangement of multiple prints, for that matter) don’t have to form a perfect shape, but it’s a good rule of thumb to keep prints evenly spaced from each other. They don’t have to be, but for most guys, it’s an easy guideline to follow. Most of the prints shown above are evenly spaced on all sides, but there are a couple exceptions where a particular frame wouldn’t cooperate. Just do the best you can, and take advantage of a lady’s touch if possible — they have a better eye for these things, or at least care more about the final result!
To make life easier, cut out pieces of paper that exactly match all your frames. Using painter’s tape, lay out your entire gallery on the wall before placing any holes. Then simply move from one piece of paper to the next, replacing it with the real thing, roughly using the steps outlined below. It’s admittedly tough to do, but the effect is worth it.
Hanging the Picture
Now that you have the perfect spot picked out, you first need to do some more measuring and also some taping.
There are numerous methods to measuring and marking where your print will go — each with their pros and cons. I’ve found using painter’s tape, specifically to mark the top edge, to be the best combo of quick/easy and exact.
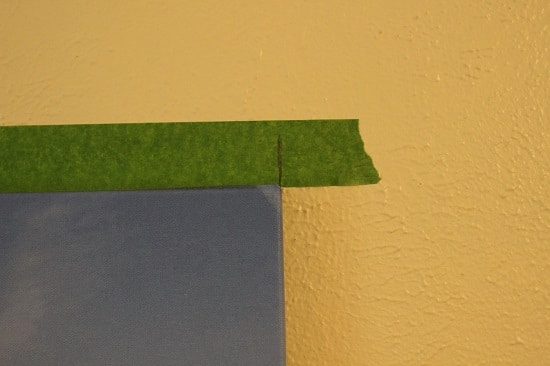
First, have your handy dandy helper hold the picture up to where you’ve decided it will be — that is, place the center over the mark you made when deciding on placement. Then put painter’s tape along the top edge, making sure to go the entire length of the frame and a little bit beyond. Once placed, put pencil marks on the tape to note the edges of the frame.
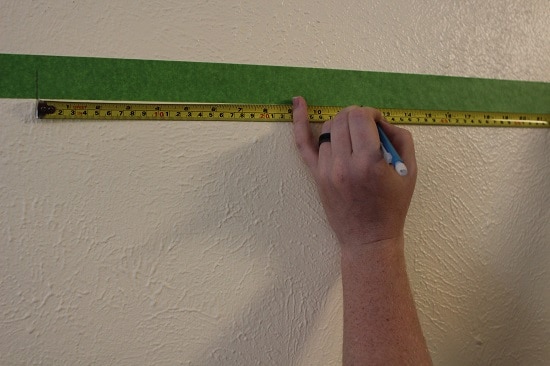
From there, measure and mark where your nails/hooks will go along the horizontal plane. If using one nail, measure the width of the frame and split the difference. Above, my frame is a lightweight two-foot-long canvas, so I’m placing a mark at one foot. If using two nails, divide the length into thirds.
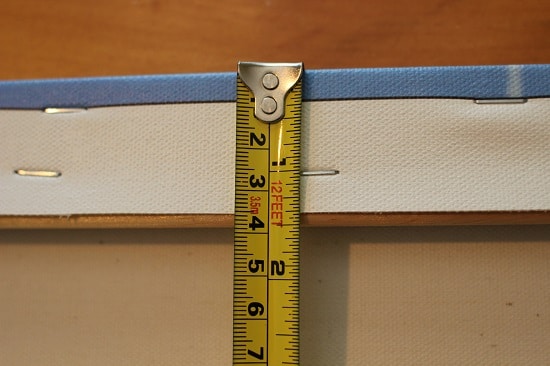
Once you’ve marked that, you’ll then need to measure down, on the print itself, from the top of the frame to where the nail/hook will be. If the print has a wire, pull it taut; if it has d-rings or sawtooth hangers, measure to where the nail will sit. On my canvas here, it came to 1.5″.

Next, it’s as simple as measuring that same distance down from the halfway mark in your tape, and hammering a nail or drilling for an anchor. Once the print is hung, use a level (either analog or on your phone — there are tons of great apps!) to ensure its evenness. Then you can enjoy a beautifully hung print!
What tips and tricks do you have for hanging prints on the wall?