I’m a big fan of plyometric exercises. They’re designed to increase speed, power, and explosiveness and are a great supplement to your regular strength training routine. Many lower-body plyometric exercises utilize a box of some sort that you jump on and off. If you go to a gym, you likely have access to plyo boxes. But if you work out in your garage, getting your hands on a box from one of the many fitness companies out there is going to cost you a pretty penny. An unassembled box from Rogue fitness will cost you $125 plus $20 in shipping. And you still have to put the thing together when it gets to you! Sheesh.
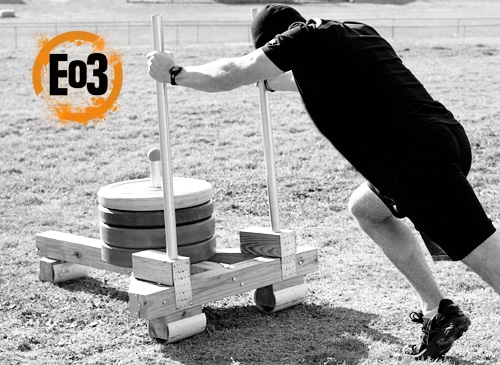
Thankfully, Jerred Moon from End of Three Fitness (who previously showed us how to make a DIY Prowler Sled) was in Tulsa a few months ago and stopped by to show me how to make my very own plyo box for just $30. Here’s how to do it.
The Difference Between a 3-in-1 Box and the Trapezoid Plyo Boxes

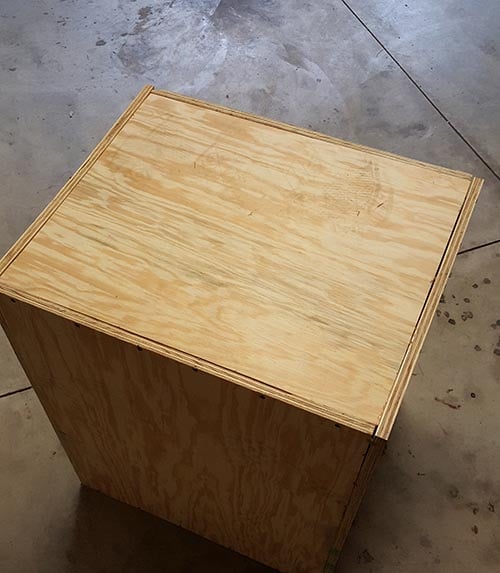
You’ve likely seen the plyo boxes that look sort of like a trapezoid. The reason they’re designed like that is so that the jumper doesn’t catch their shins on the edge as they jump on the box. Our plyo box is a straight-up rectangle. Yes, if you don’t jump high enough or with proper form, you will bang your shins on the edge and it will hurt. This box encourages you to jump high enough to clear the edge completely.
Another benefit with this design is that it gives you three different heights to work with. This box is 28″ x 24″ x 20″. If you want to do 28″ box jumps, just flip the box so that the longest side is vertical; if you want to do 24″ box jumps, flip it to another side; if you want to do 20″ box jumps, flip it yet again. In other words, this box will grow with your fitness level and is extremely adaptable. It’s handy if you and your workout partner are at different levels too — you don’t get that with the fixed heights of trapezoid plyo boxes.
Tools & Materials Needed
- Skilsaw or table saw
- Drill
- Measuring tape and straight edge
- Pencil
- (1) 8′ x 4′ piece of plywood that’s 3/4″ thick
- Gorilla glue
- Box of 2″ wood screws
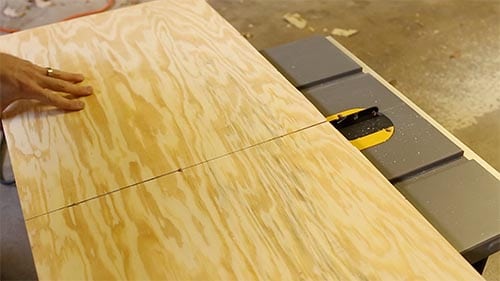
Step 1: Measure Your Cuts
This box will end up being 28″ x 24″ x 20″. Here’s how to make the cuts for that.
We need to cut the plywood into the following pieces.
- (2) 28″ x 20″ rectangles
- (2) 28″ x 22.5″ rectangles
- (2) 22.5″ x 18.5″ rectangles
You can do this at home with your table saw, but if you want to save some time, you can have the folks at Home Depot or Lowe’s make the cuts for you. The first two cuts are free and then it’s like $.50 a cut after that.
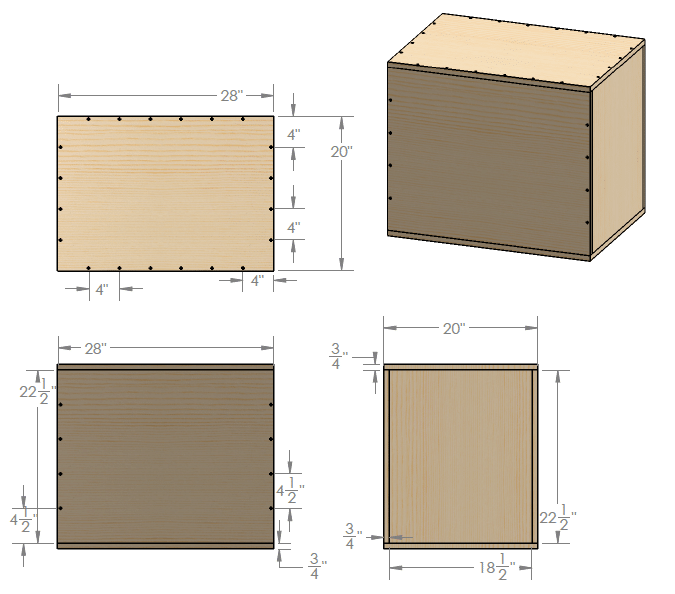
Thanks to AoM reader Robert Heffern for putting together this CAD of the box.
Step 2: Cut Your Pieces
Step 3: Do a Preliminary Assembly to Check For Evenness
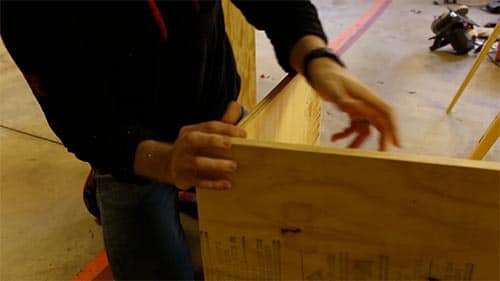
Before you glue and screw your pieces together, Jerred recommends doing a preliminary assembly to see if everything lines up correctly. Edges that aren’t flush with one another will make your box wobble, which isn’t safe. Just put the pieces together without gluing them and make sure the edges line up evenly. If they don’t, either sand or cut until things are flush.
Step 4: Glue and Screw
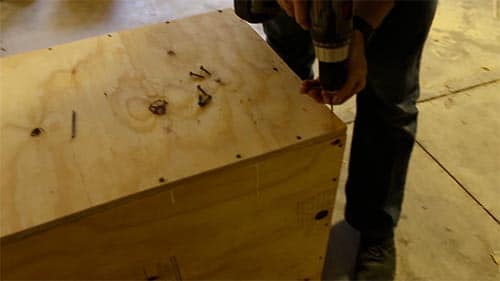
Assembly is a breeze. It’s just gluing and screwing. You want to connect the pieces so that the smallest ones (the 22.5″ x 18.5″ rectangles) are encased by the other two rectangles, like so:
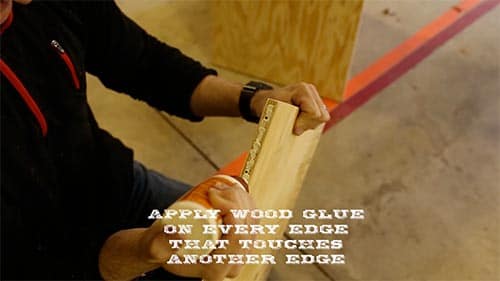
I highly recommend drilling pilot holes before you start screwing things together. And for added reinforcement, put Gorilla Glue anywhere wood touches wood.
There you go! How to make your very own plyo box. You will now be the most explosive and powerful man in your neighborhood. We hope you found this tutorial helpful.
My thanks to Jerred Moon for doing this tutorial with me. Be sure to check out End of Three Fitness for more great DIY gym tutorials as well as training programs.