Editor’s note: This post was written by Bryan Black and originally ran on ITS Tactical.
So why should you climb rope? First of all, if you’re not including rope climbing in your workout routines, you’re missing out on one of the best forearm and grip workouts around.
Climbing rope is also a core component of building functional strength. Every man should be able to physically save himself, and rope climbing trains many of the same muscles you’d need to pull or lift yourself to safety.
Sourcing a Rope to Climb
If you’ve never attempted to climb a rope before, don’t worry; I’ll address that below. The first step in progressing into rope climbing is an obvious one. Get yourself a rope! There are a couple of options I’ll recommend here.
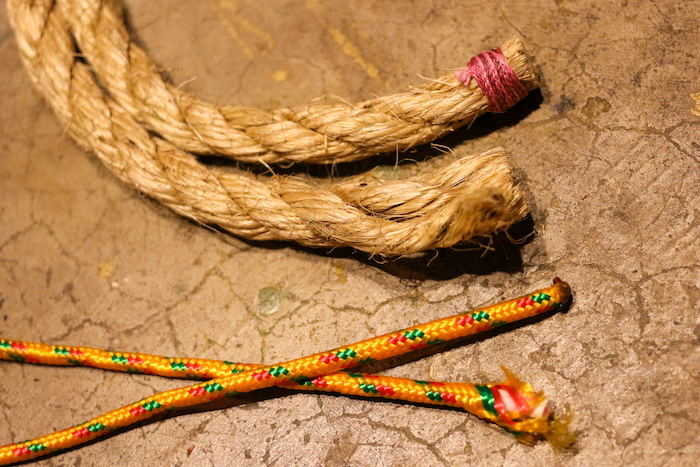
Manila Rope

The first option is to purchase a good natural fiber Manila rope that’s at least 1 1/2″ to 2″ in diameter and 20 ft. long. I found a fairly good deal on Amazon for a 30 ft. 2″ diameter Manila rope for $150. The only issue I see with buying something like this is the attachment method, for which I’d recommend cutting one end off and creating an eye splice.

Eye Splice
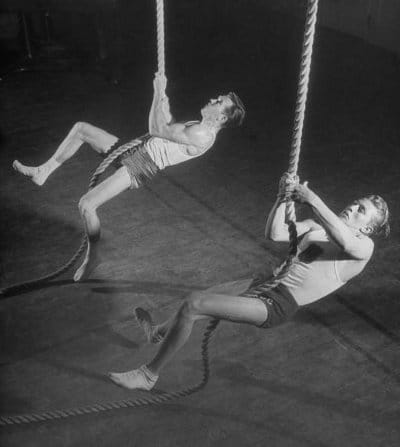
Creating an eye splice in one end will allow you to climb a tree in a park or your backyard and girth hitch it over a branch to start climbing. The downside to using a Manila rope is that it will fray over time, as you can see in the picture of the climbing SEALs above!
Fast Rope
The second option, which I highly recommend, is to make your own Fast Rope. By making your own Fast Rope, you’ll not only gain the practice of tying a multitude of knots, save money, and build something awesome, you’ll end up with a climbing rope that will last much longer than a natural fiber rope.
There are sometimes auctions on eBay too for used Military Fast Ropes, but they’re usually very worn, and you won’t know the history behind the rope or how stable it is.
Climbing Techniques
There are three different techniques I’m going to address today, and below you can watch a video of each of these being used and see why I prefer to climb with the brake-and-squat technique I was taught in BUD/s. You should also climb in pants and boots to save your shoes and legs from rope abuse.
While any of the techniques I’ll explain below will allow you to climb a rope, there’s only one I’m going to recommend based on speed, fast reacquisition of the rope, and energy savings.
Gym Class Technique

The first technique I’ll address is the typical way I see people climb rope that have never been properly taught how to climb. I call it the “gym class technique,” because if you’re like me and went to elementary school before schools were afraid of being sued, you probably used this technique to get up the rope.
Gym class technique is where you pinch the rope between your feet, reach up with your hands to pull up on the rope, and then repeat. While you can manage to get up a rope using this method, you’re working twice as hard. With any technique, the goal should be to use your legs to get up the rope without depending on upper body strength.
That’s not to say upper body strength isn’t important or needed to climb, it’s just to say that your legs should contribute and not just hold the rope.
Brake and Squat (Marine Style)

Marine-style brake and squat is what the Marines teach in boot camp; while effective, it’s not a very quick technique, and it can create extra work by forcing you to reacquire the rope if you lose the wrap. With any brake and squat technique, the goal is to work your way up the rope by using your feet to put the brakes on the rope in a squatted position, and simply standing up, reaching as far up as you can, and repeating.
The technique for the Marine-style brake and squat is as follows: First you jump up with your arms extended, letting the rope either fall between your thighs or to the outside (I’ve seen both). From there you single wrap the rope around one of your legs and across the top of your boot. The boot of the unwrapped leg clamps down on the other boot, trapping the rope. You can now support your weight without using the power of your arms and hands.
I don’t personally care for this method, because as mentioned above, you have to re-wrap the rope around your leg if it’s not feeding through your legs as you climb up. This can lead to extra work and getting beat when racing a buddy.
Brake and Squat (BUD/s Style)

During BUD/s I was taught to use a very simple brake and squat technique that’s extremely fast, makes it easy to reacquire the rope, and will beat any other technique for speed. We’d have team rope climbing races all the time, and it would always be the guys using the Marine-style brake and squat technique (despite being taught otherwise) that would slow a team down and cause them to hit the surf. It pays to be a winner!
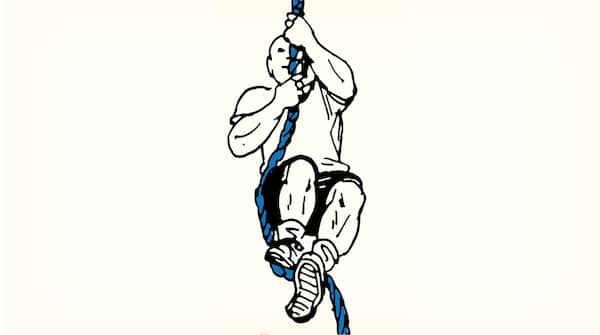
All there is to the BUD/s style technique is to jump up to grab the rope high, letting the rope fall on the outside of a leg. Using the leg that the rope falls to, simply step on it by using the opposite foot to help. The combination of the rope falling across the top of the opposite foot and stepping on the rope with the other foot will lock the rope in place.
The idea here is to always reach up as high as you can before you “squat” your feet back up the rope and stand up to gain more height. The quickest guy I ever saw climb rope at BUD/s seriously looked like his feet would reach all the way to his chest before he’d stand up. It was truly amazing to watch.
You can stand in this position all day and take some of the work off your arms. Coming down from the rope is super simple as well–just relax the tension with your feet as you descend and the rope will flow through your feet easily.
Beginner’s Tips
If any of these techniques are more than you can physically master, start slow. You can work on the upper body strength needed to climb rope by using your rope to do pull-ups or even throwing a towel over a pull-up bar and doing towel pull-ups, as this will work the same muscles. For technique work, simply get on the rope and practice locking it in with your feet.
Advanced Techniques
A few other techniques you can use to climb a rope are climbing without your legs, climbing without your legs from a L-Sit position at the bottom of the rope, and even climbing two ropes side by side without your feet. I find that I have the hardest time with the L-Sit technique, as I figure my core is weak in that area or my technique just sucks!
Climbing without your legs is an intense forearm, bicep, and back workout. It requires excellent grip strength and not being afraid of heights! I’ve successfully climbed two ropes without using my feet, one in each hand. Let me tell you though, it’s not an easy thing to do! I had a few close calls trying to climb like this and nearly fell twenty or so feet attempting it. Be careful if you decide to attempt the advanced techniques!
Workouts
While pretty self-explanatory, in terms of workouts, the best thing to do is to incorporate a number of rope climbs into your workout routine. When I have access to a rope, I’ll usually throw push-ups, sit-ups, dips, air squats and a rope climb or two into 3-5 sets. Doing other thick rope and grip exercises can build your climbing muscles as well.
On days where you don’t have a rope available, you can also figure on subbing in 15 pull-ups for every rope climb; it’s definitely not the same movement as a rope climb, but it’s the closest movement and repetition count to climbing a 20 to 30 foot rope.
Video
Disclaimer
Climbing ropes is inherently dangerous should your grip give out while you’re on the rope. Use caution and know your limitations before you get too high and can’t hold on any longer!
__________________________________
ITS Tactical (Imminent Threat Solutions) is an awesome website run by Military Veterans and those serving in the Special Operations community that covers skill-set information, tactical gear reviews, and DIY projects that can help you live better and survive any scenario. Check ’em out and become a member! Since AoM and ITS admire each other’s work we’ve agreed to swap one article each month to share with our respective readers.