Editor’s note: This is a guest post from Matthew Pisarcik & Sebastian Sandersius, the founders of Bison Made.
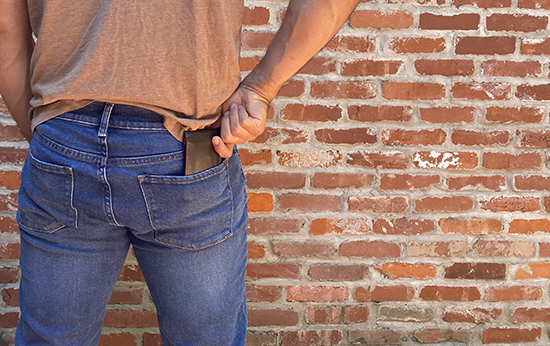
Nothing is manlier than making something with your own two hands. It’s a source of pride to build something that you can call your own. However, nothing is more frustrating than purchasing something expensive with your hard-earned dollars and having it fail on you. In this article, we want to address a common problem for men: their wallets don’t hold up.

Your wallet gets more use and abuse than just about any other accessory throughout your daily life. And while most fashion label brands build their wallets to look nice in the store, seeing it a few months later is a different story. From unraveling thread to ripping liners, today’s average wallet is designed to wear out. So before dropping your dime on another department store wallet, consider the following guidelines to make your own that will last the rest of your life.
Click on any image below to see a larger version.

Blueprint for wallet design. Click for full size image/pattern.
The first thing that you need to make a wallet is a well-engineered design. We have provided a basic blueprint that is streamlined with a clean, modern look. All the correct dimensions are accounted for to carry the tender of any world currency. This wallet design is known as an Ambrosian manifold, consisting of four pieces of leather that are folded and stitch-assembled into a bi-fold wallet with a single pocket for bills and six pockets for cards.
Materials
Leather
You will need about two square feet of material. We recommend vegetable-tanned leather that is of 2oz thickness. Yes, leather thickness is measured in ounces – it is possible to use 1oz of leather if you want your wallet to be extra thin, and 3oz if you don’t mind the extra bulk. It is possible to use other types of leather, but it is important that the leather be relatively rigid to ensure a firm wallet.
Stitching
Find a color that compliments the color of leather you chose. If unsure, consult the authority on matching in your household: your wife or mom. Using a thread color that is darker than your leather is usually a good start. As for size, we recommend using a thread that is no smaller than TEX138 or larger than TEX270.
Tools
- Scissors
- Razor blade
- Straight rule
- (2) pushpins
- Awl (or something similar like an ice pick)
- (2) ball point stitching needles.
Construction
STEP 1

Whether you decide to create your own design or use the pattern we have provided, the first thing you will need to do is to print the design and cut out the paper patterns. Next, trace the patterns onto a sheet of leather.
STEP 2

Now you will have to carefully cut the pieces out of the leather. Cutting the leather with clean lines will be made easy by using a rotary blade alongside a straight edge ruler. After the pieces are cut out, you need to punch stitching holes into the leather. Use push pins to tack the paper pattern to the leather piece and use an awl (or something like an ice pick) to punch evenly spaced holes. The holes only need to be big enough for your needles and thread to pass through without too much resistance.
STEP 3

Now you are ready to assemble the components together. The smaller pieces A and B are layered on top of C, which all goes on top of D. Next, fold the leather to see where the holes should line up. Creasing the leather thoroughly will make stitching much easier. We have provided a color-coded illustration showing stitching paths with start and end points for your thread. There are various methods for hand stitching but for this assembly, we recommend you use a method called hand saddle stitching. With saddle stitching, there is one thread and two needles (one at each end of the thread). To bind two pieces together, align the holes together and weave two needles through each aligned hole.
STEP 4

To begin, we recommend starting with the blue stitching path. For this path you need about two feet of thread. Pass one needle through the first hole at the starting point of piece B. Pull through until there are equal amounts of thread on both sides of the leather. Take one needle and start it through the next hole from the same side of the leather. Start the other needle through the same hole from the opposite side. Grasp both needles and pull through until the stitch is good and tight. After the fourth hole, you will need to begin binding piece D to piece B. Once you have reached the end point, you will need to pass both needles to the back side and weave the threads, as shown in the middle image, so they are both sticking out of the back side of B. Take these two needles from the back side of B and add on piece C.
STEP 5

To end the blue path, weave the needles between the two aligned holes of B and C, as shown in the images above. At this point, check that the stitching is good and tight all along the blue path and make any tension adjustments needed. If all is fine, you can tie off the two threads by making three consecutive overhand knots.
STEP 6

The red path is the inverse shape, but same technique as the blue path. Following the same routine, stitch piece A to D and C. Tie off the red path and leave about a quarter-inch of remnant thread.
STEP 7

At this point you are ready to move on to stitching paths green and yellow. The first 18 stitches of these paths will be spent binding A and B to C. Once you get to the corners, you will begin to include piece D into the stitching and close up the side of the wallet.
STEP 8

The end points of the green and yellow stitching paths bring you to the corner fold of part D. At these corners, you can bring the threads through the middle, tie them off with three knots, cut the remaining thread, and tuck the knot into the corner fold. Your wallet is DONE!
Final Thoughts
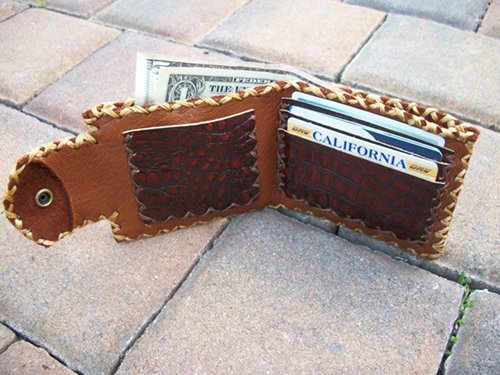
Now you will have a stylish wallet to slap on the table the next time you are out on the town. Like a well-made pair of shoes, this wallet is designed to be easily disassembled and refurbished to ensure you decades of service. Keep it looking sharp by buffing it with a horsehair brush now and again. When using it, you’ll be reminded of the skills learned while making something with attention to detail and pride. In your great-grandfather’s generation, people often made their own clothes, furniture, and shoes. When you work with your hands to build something that matters, you are making a statement that craftsmanship and pride in what you do are fundamental values still relevant for men today.
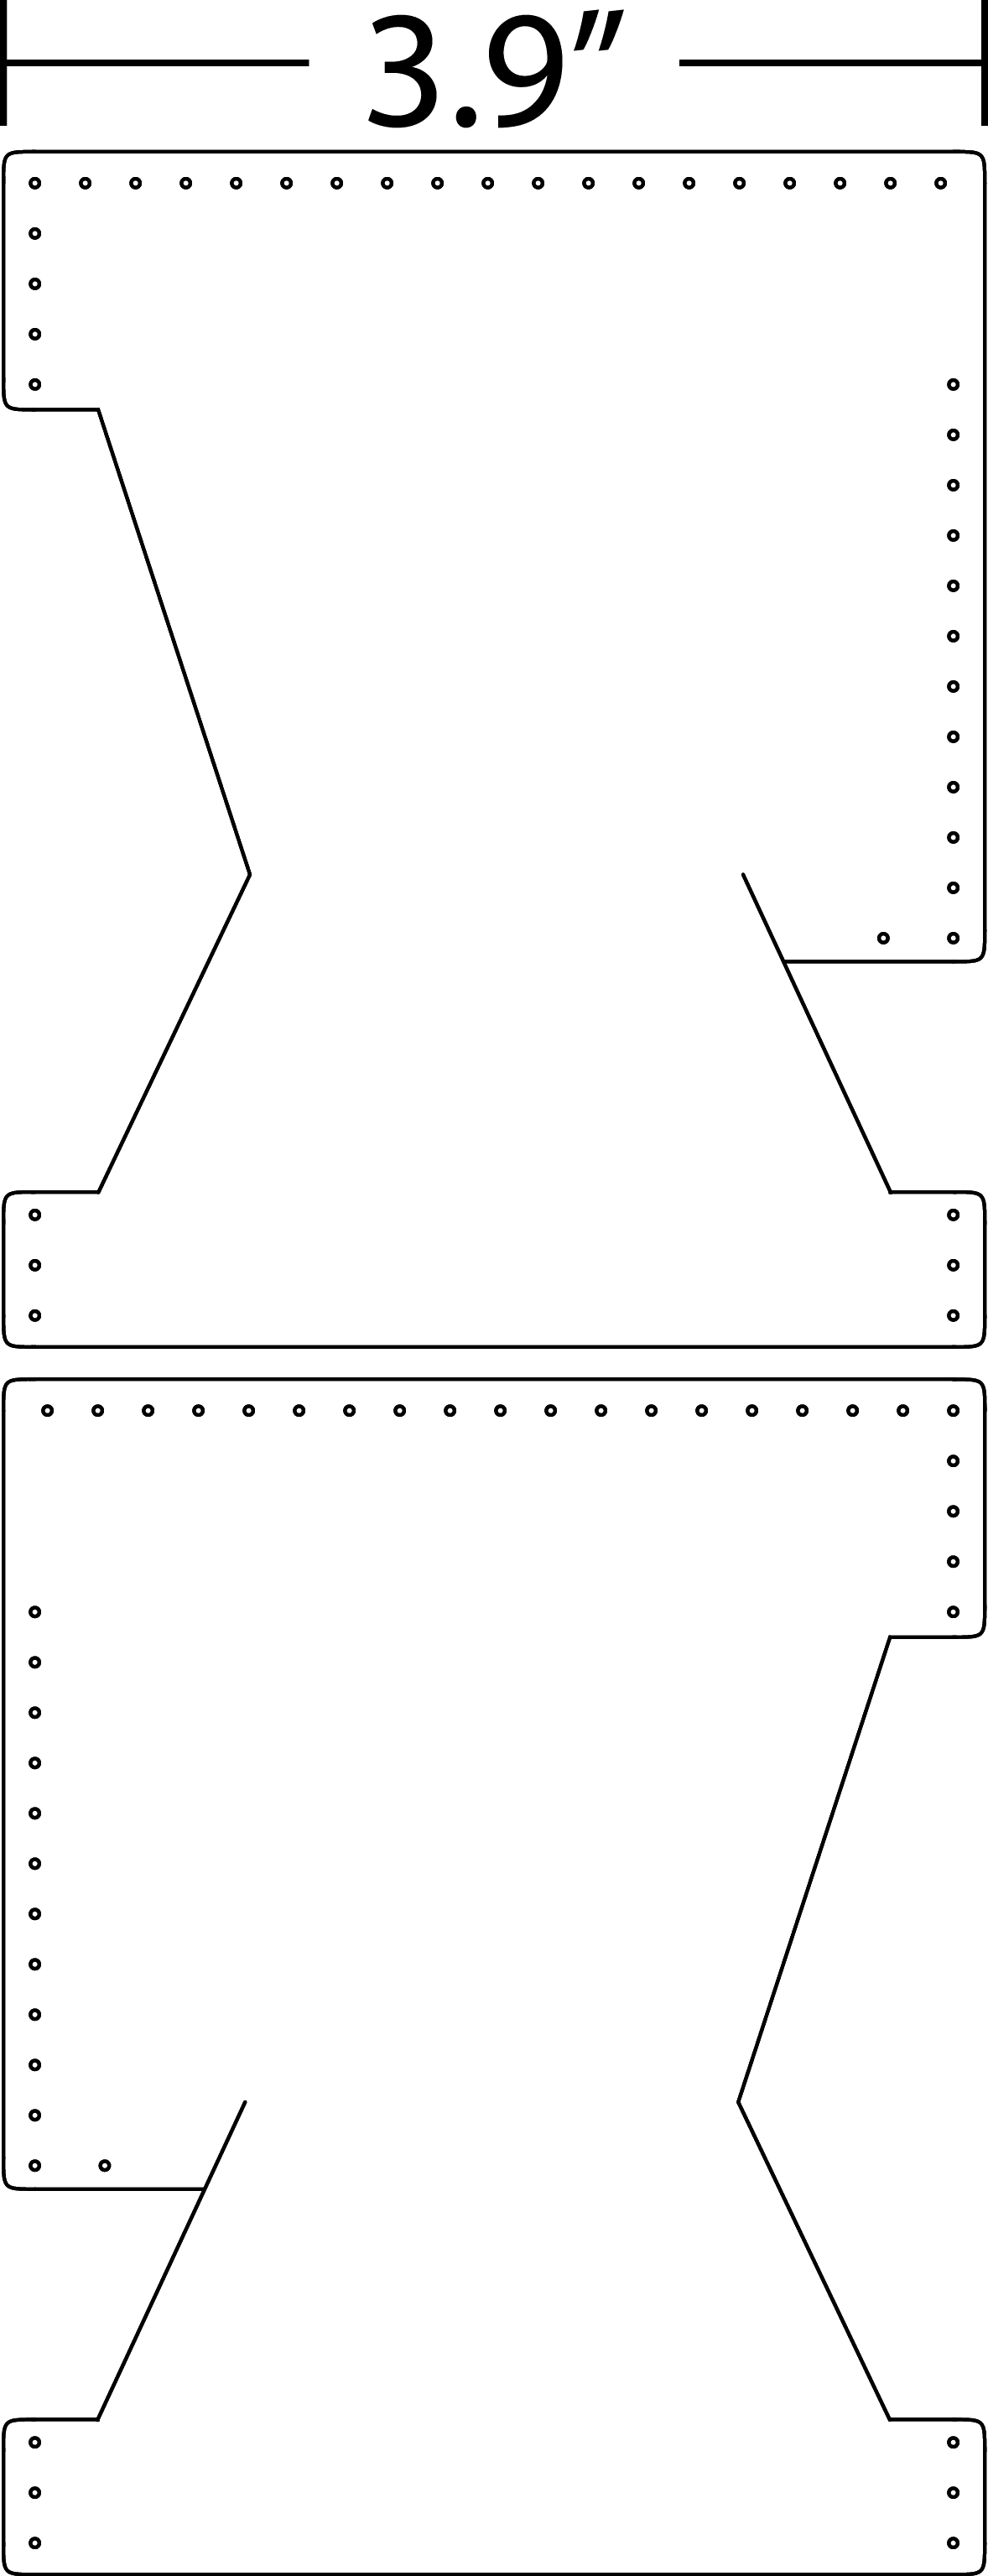
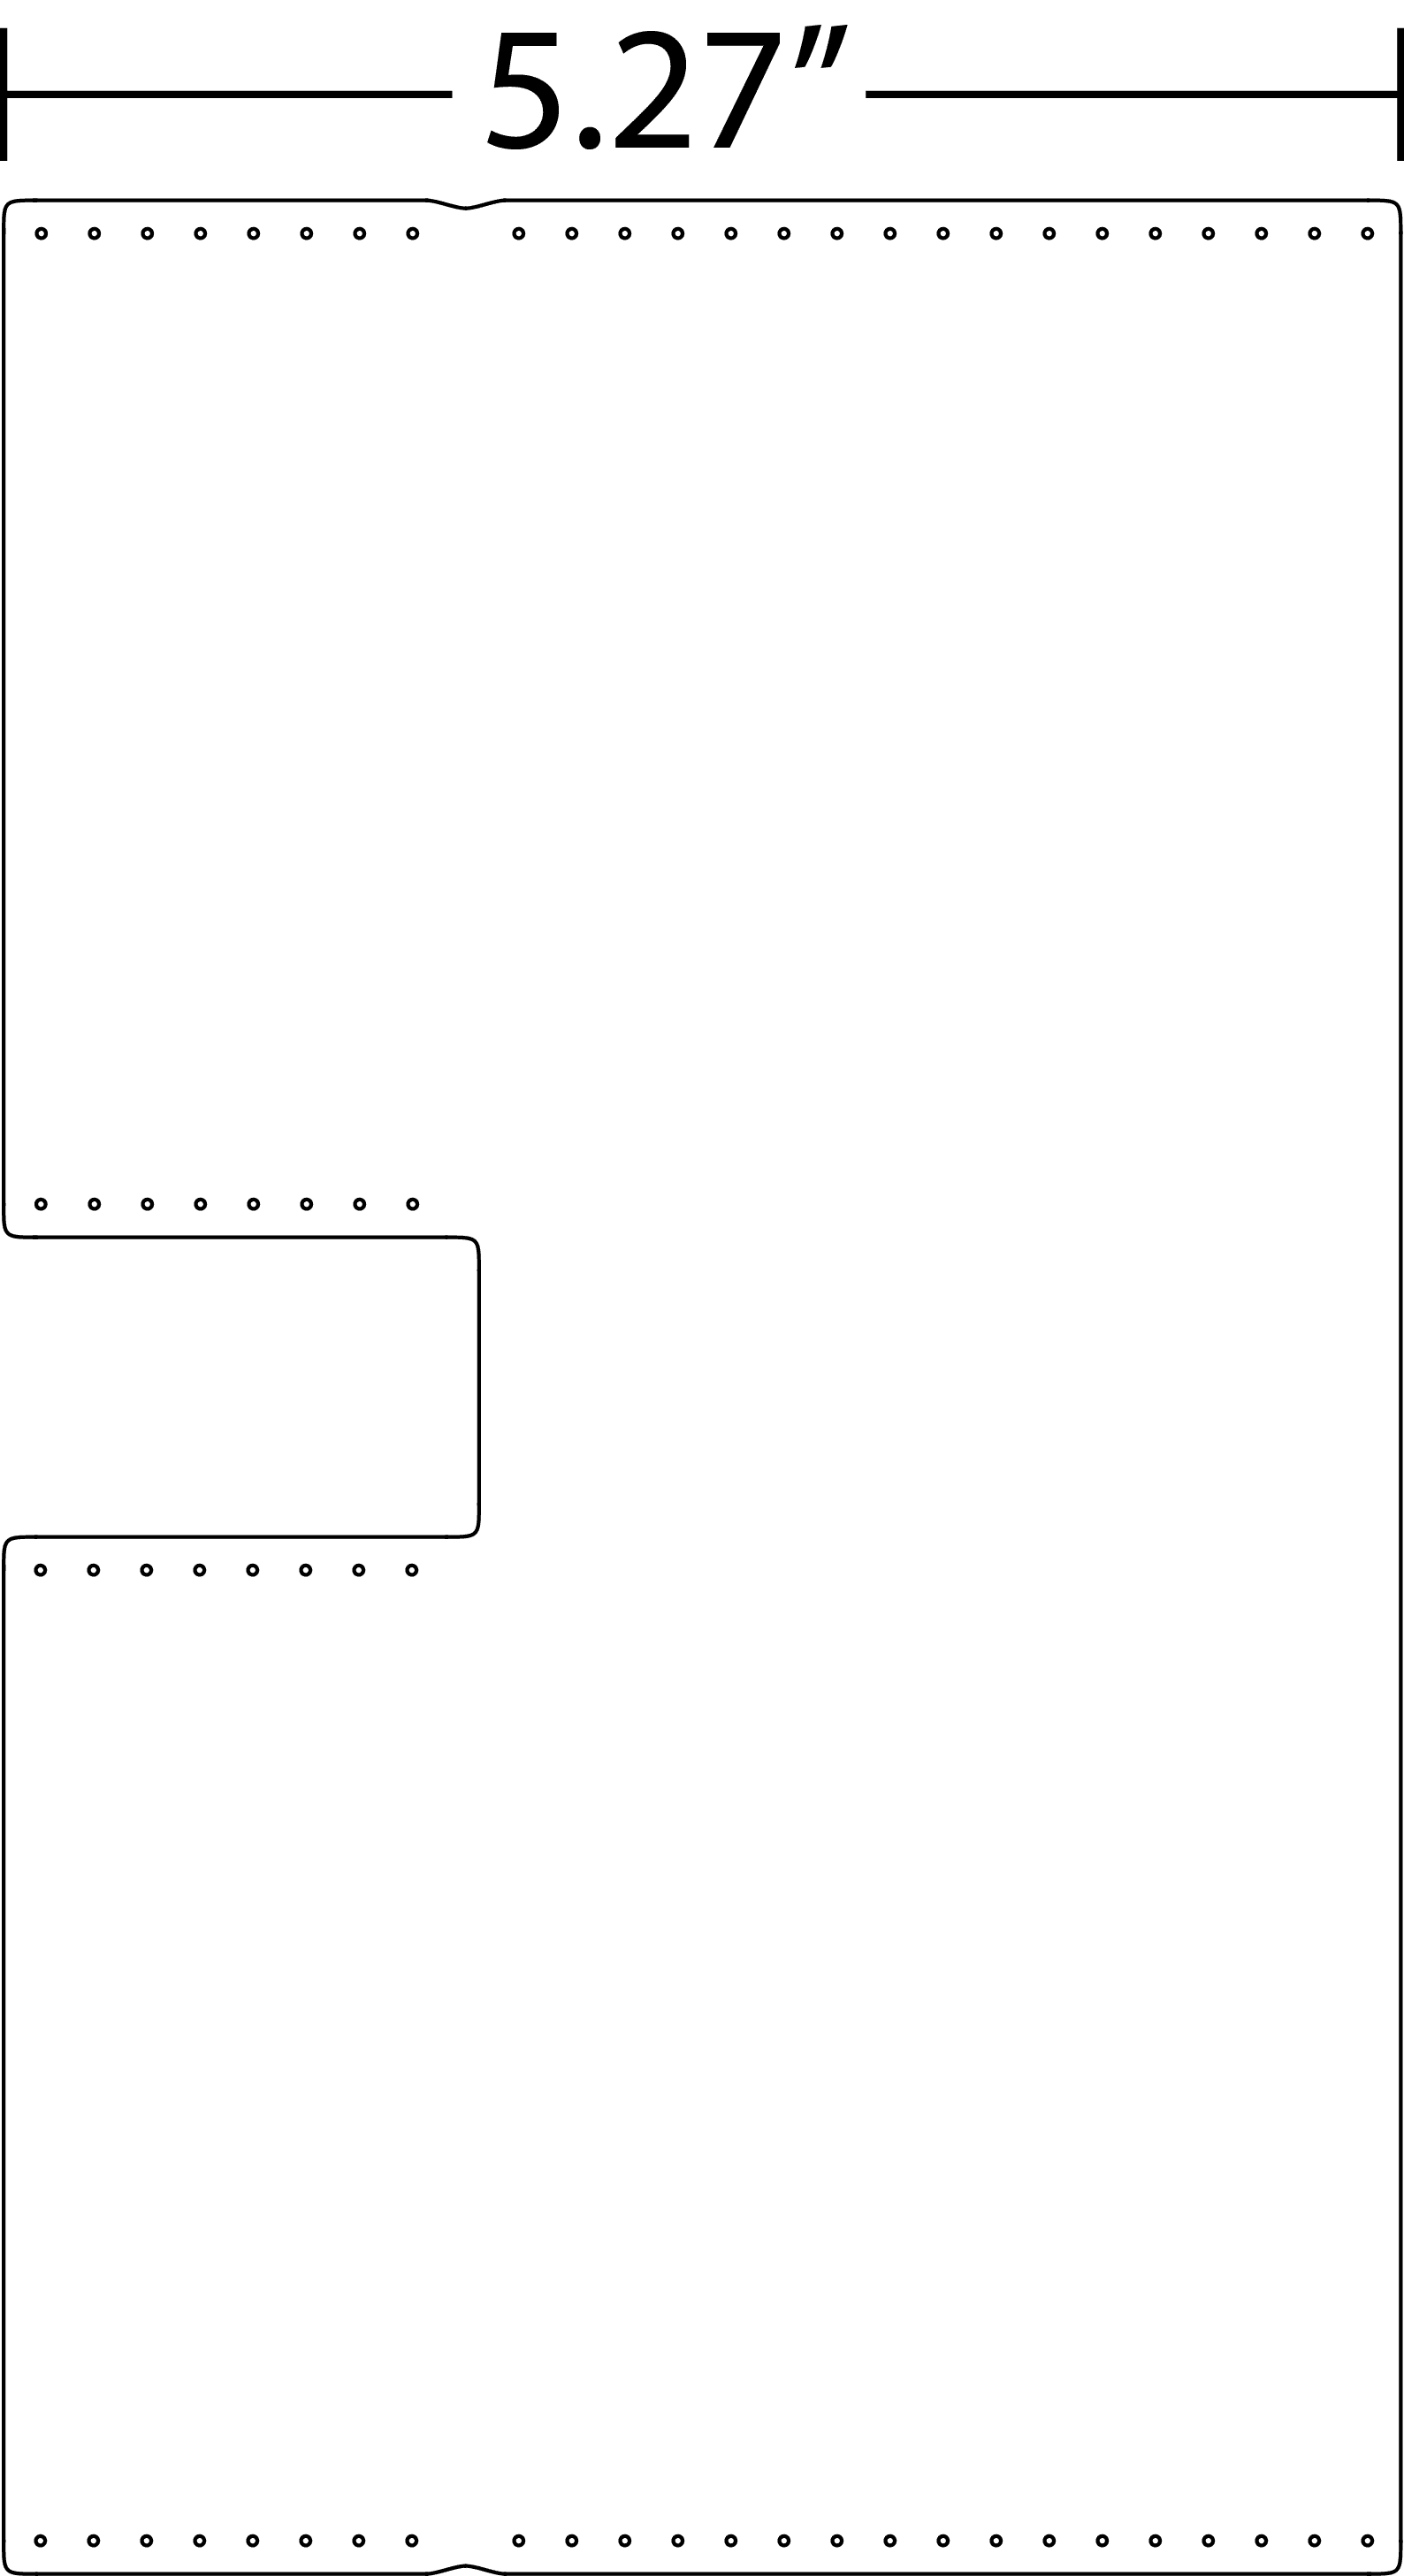
Update: Below are three blueprint images that will print to scale on regular 8.5″ x 11″ paper. The first image is parts A and B, the second image part C, and the third image part D. Click the images to bring up the full-size versions.

____________________________
Bison Made uses these same basic principles when producing quality leather carry goods. Instead of paper patterns and hand cutting, we use high precision cutting dies to create consistent leather components that are hand finished and stitched. We have taken a position that by starting with high-quality raw materials and detailed precision, beautiful and functional works that are designed for life will follow.