Unless you’ve spent a lot of time in the woods on longer trips, you’re probably unfamiliar with bannock. Bannock is a Gaelic-rooted word that comes from the Latin panecium, which means baked things. Add a thousand years of passing the word from Hadrian’s soldiers to Scottish ones and you see how panecium became bannock.
A bannock is a small, flat loaf of bread risen by a leavening agent, most often a chemical one, although yeasty bannocks are sometimes baked, as in a sourdough recipe. They are meant to be cooked hearth-side, whether a fireplace or a campfire. They are simple, and in the woods, simple is good. Add some honey to some simple bread and after a few days or weeks of bagels and Wasa bread, it tastes like manna from heaven. It’s hot, light, and comforting.
About twenty years ago I shared a workspace with a really cool woman. Frieda ran across an article in an old, dog-eared copy of Outdoor Life regarding dutch ovens and skillet cooking. Freida thought I would like it. She was right.
Until then I had been using a bannock recipe that came from old-style camping legend, Calvin Rutstrum. Frankly, it was a chemical bomb using horrendous amounts of baking powder and no shortening, so it was dry and metallic. If anything contains a tablespoon of baking powder, run the other way unless you like the taste of aluminum.
I took home the recipes from the article and whipped up a few batches of bannock on the stovetop. It was a vast improvement over what I had been using. What’s better is that the basic recipe is also good for pancakes, fish batter, etc. Think Bisquick or Krusteaz without 10,000% of your daily recommended dosage of salt. Sure, you can use those pre-made mixes, but this recipe is so simple, it’s a shame to subject your tastebuds to pre-packaged sodium bombs.
How to Make Bannock Bread
Ingredients
- Bannock Mix
- Water
Basic Bannock Mix
1 cup flour (white or a mixture of white and whole wheat)
1 tsp. baking powder
1/4 tsp. salt
1/4 cup dry milk powder
1 tbsp. shortening
Make the mix at home ahead of time. Sift dry ingredients, and cut shortening in with a pastry cutter or two knives until you have a granular, corn meal-like mixture. Package in zip-lock freezer bags. Double bag it if you’re going to be on a long trip. I’ve found that you can make large batches at once and make enough bannock mix for a trip in about fifteen minutes. Just make sure you sift the dry ingredients well, so you don’t get leavening problems.
Directions
Baking bannock is relatively simple once you get the hang of it. Your first ones will be dark and maybe burnt on the outside and gooey on the inside. Don’t despair, just pretend it’s a jelly donut and try again. The key is a consistent heat. While flames don’t indicate a bad cooking fire, red glowing fires from hardwood are best.
1. Start with a small cast iron frying pan and oil it well.
2. Pour some water into the bag and squoosh it around in the bag (squooshing is a technical term). Because the water and baking powder form carbon dioxide to make the bread light, the faster you go from mixing to skillet, the lighter your bannock will be. There will be lumps, of course, but we call them flavor bursts. I say “some water” because how much you add depends on the humidity and of course, personal taste. You don’t want it any thinner than a muffin consistency. If you’ve never baked a muffin, think spackle. You can distribute the dough with a poke of a finger or a stick or a spoon if you’re the civilized sort. Remember, it’s always easier to add water than take it out, right?
3. Squeeze the mix out of the bag and onto the warmed pan (not scalding hot — if the oil is smoking, it’s way too hot). The pan can be warmed over the fire if you have a grate, or leaned against a few logs near the heat source. It shouldn’t hiss or sizzle like a pancake batter…that means things are too hot. Cool it off and be patient. The bread will start to rise slowly.
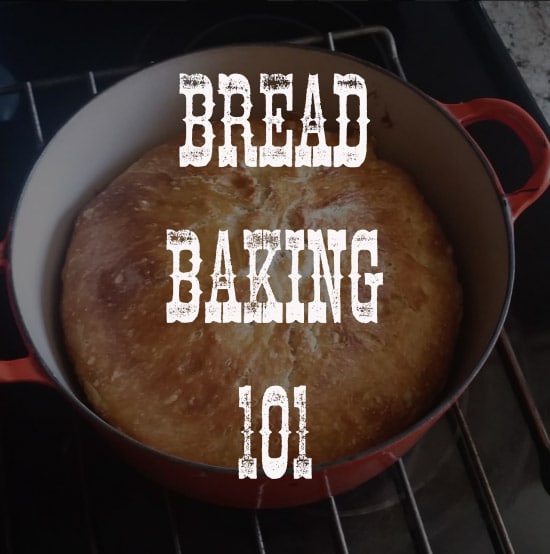
4. Your bannock will start to look loaf-like. At this point you’ll want to flip your loaf. A little shake of the pan and flick of the wrist can turn it over, but a spatula is fair game too. At this point, just keep turning it. You’ll know when it’s done. It’ll look a lot like the picture here.

If you have a lid, you can try to cook your bannock dutch oven-style and put coals onto your skillet lid. Otherwise, you can turn it over to cook the top (carefully!) or else when the bottom is done, prop the pan up against a log with the top facing the fire. This is my favorite sort of “semi-reflector-oven” method. I believe it also makes a lighter bannock.
Baking bread in the wilderness is about taking the comforts of home with you and enjoying yourself, not choking down some freeze-dried Hungarian goulash that tastes like wallpaper paste. You can still eat tasty grub while getting in touch with your wild man.
___________________________________________________________________________________
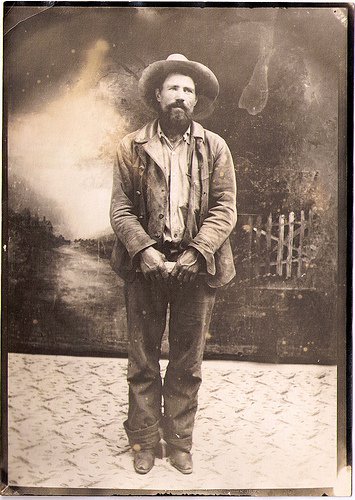
 Darren Bush is the owner and Chief Paddling Evangelist of Rutabaga, but he’s also an amateur blacksmith, longbow shooter, and primitive skill aficionado. He believes primitive skills are highly undervalued in modern society.