Few images of summer being ushered in are as iconic as dear old dad or grandpa sitting on the porch with a cold beer in his hand. It’s likely that beer came from one of the Big 3 in the industry: Budweiser, Coors, or Miller. There’s little chance your pops was making his own beer in his kitchen or garage.
My how times have changed though. Since homebrewing laws have relaxed in the last decade or two (before that they were rather stringent — reducing homebrewing to an underground hobby), small batch craft beer as a whole has enjoyed enormous growth, both in the commercial and DIY realms. With an investment of about 100 bucks, you can get all the equipment you need to make great beer at home, and that equipment should last many years. And for about $50 (and often less), you can buy all the ingredients you need to make about 50 bottles of beer, which comes to much less per bottle than you’d normally pay for a high-quality brew.
Today, I’ll take you through the types of homebrewing, supplies and ingredients needed, as well as a general outline of the steps and principles of making good beer from a kit. Let’s get started!
Why Beginners Should Start Homebrewing With a Kit
There are a few tiers of brewing that differentiate the occasional brewer from the true hobbyist. Using kits is the starter tier. You have everything provided for you in a handy-dandy box — malt extract, yeast, hops, even bottle caps. You’re also provided a step-by-step recipe that makes it pretty darn easy to achieve a drinkable and enjoyable bottle of beer. (If you aren’t familiar with the general process of how grains are turned into beer, here is a great and quick guide as to how it works.)
As skills, tastes, and budget increase, a homebrewer can work their way up and produce higher-quality beers. You’ll end up creating your own recipes, mashing your own grains, and generally having more control over the process. With beer from a kit, you’re basically combining ingredients on the stove in a certain order, maintaining cleanliness, and ensuring that directions are followed. To be honest, there’s not much creativity involved.
But, that’s okay at first. When I asked Aaron Holstad and Branden Miller of Black Shirt Brewing about which type of homebrewing the beginner should pursue, they unequivocally said one should go with kits unless they’re ready to invest more money and time into their hobby and become true amateur at-home brewers.
So there ya go. Straight from the horse’s mouth. While it might feel a little like cheating to brew from a kit that has everything pre-measured and ready for you, it provides a great way to get started brewing, and gives you a feel for the steps necessary. If it’s something you’ll only do once a year or so (like me), you’ll be hard-pressed to find it worth it to invest in more than just your basic supplies. And if you decide you love it, and want more creativity and control, then you can decide to take things up a notch.
Why You Should Read This Article Before Making Beer From a Kit
In this article, I won’t be providing super detailed step-by-step instructions, but more general guidelines for coming out with a great batch of beer. Why is that? Every kit you buy is unique, and has slightly different ingredients, brew times, etc. Use my principles, then rigorously follow the recipe/directions that came with your kit.
If you’re wondering why you need an article on how to make beer from a kit, if it already comes with directions, know that while the kit simplifies and streamlines the brewing process, there are still sticky points the first time you try it. While the first batch of homebrew I made a few years ago was okay, I was pretty clueless about the whole operation. I didn’t really understand what the various supplies were for, I didn’t understand the process enough to know how to troubleshoot any issues, and I wasn’t even sure what my beer was supposed to look like in a few of the steps. I’ve gained a bit more experience over the years, and I’ve also had a chance to talk to some professional brewers about the most important homebrew principles, as well as a couple ways the amateur should deviate from a kit’s directions to really get a great beer. In understanding all the supplies and processes behind kit brewing, you’ll be better able to handle any problem and have a better chance of creating a beer that’s worthy of sharing.
Supplies + 2 General Parts to Beer Making
All these supplies are readily available in kits that you can get from any local homebrew store (which have become more common in big cities), or on Amazon. You can buy the things piecemeal, but the price wouldn’t be much different. The only things in the list below that you often won’t find in a kit are the brew kettle, thermometer, and hydrometer.
Your brewing can generally be broken down into two primary steps: brewing and bottling. Brewing takes place on the stovetop in a big kettle, and it’s then placed into a 5-gallon bucket (often fancily called a “fermentor”) to let the yeast do its thing and turn your liquid into an alcoholic beverage over the course of a week or two. The next step is bottling. Here you transfer your beer into a bottling bucket (yet another 5-gallon bucket, but with a spigot assembly), fill 12 oz bottles with the stuff, and then let that sit for a couple weeks to carbonate (or “bottle condition”).
In that light, I’ve broken supplies, and tips, into separate sections.
Brewing Supplies
- Beer ingredient kit. Something like this. There are kits available for every type of beer imaginable. The vast majority of kits are made for 5 gallons of beer, and come with all the ingredients you need. You’ll likely want to buy fresh yeast versus what comes with your kit, but I’ll speak more to that later.
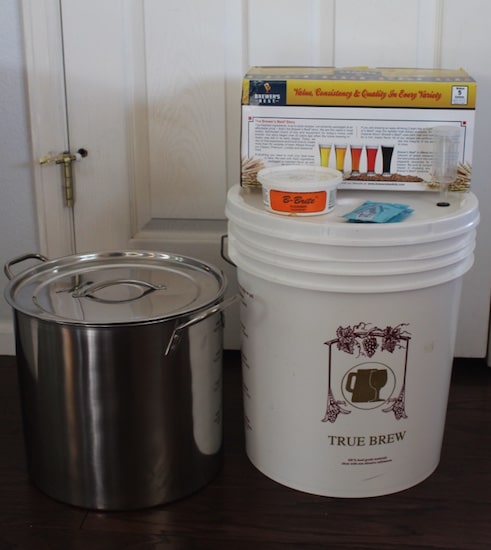
- 5-gallon brew kettle. When I first started brewing a few years ago, I was simply using a large 3-gallon soup pot. It wasn’t big enough, and I ended up either close to boiling over, or having to use another smaller pot to ensure that didn’t happen. When the kit directions say to use a 5-gallon kettle, they mean it. I picked one up for this latest batch for about $30 at a homebrew store.
- Fermentor (or 5-gallon bucket). The fermentor is the vessel where the liquid you cook on your stove will turn into beer via yeast. You can use any new 5-gallon bucket (don’t use one that you’ve used for, say, yard work or house cleaning), it just has to have a lid with an airlock (basically, a hole drilled in the top and one of these securely stuck in). Since any kit will have a fermentor, though, it’s often easier to just go that route.
- Sanitizer/cleaner. As I’ll discuss in more detail below, sanitization is everything in brewing. Your standard dish soap won’t do it, so make sure you have a specialty brewer sanitizer (the container with the orange label in the picture) that is guaranteed to kill all the invisible bad stuff that could wreck your beer.
- Thermometer. There are a couple instances where an accurate measure of your liquid’s temperature is important. Whether it’s steeping grains, or letting the beer cool so you can “pitch” your yeast (that’s brewer talk for sprinkling your yeast over the beer when you get it into the fermentor), something like this with a long probe does the trick well.
- Hydrometer. For measuring the “specific gravity” (its density compared to water) of your beer, which can tell you the alcohol percentage. In all honesty, I don’t care much about that (and my wife is a pretty good guesser!), so I don’t make use of this. If you want to, though, read up here on what specific gravity is, and how to best measure it.
- Large spoon. For stirring. Any large kitchen spoon will do the trick, just don’t use wood, as it’s nearly impossible to truly sterilize to the degree needed. Many brewers prefer stainless steel, as it’s less prone to scratches (where bacteria can hide and live), but I’ve had little trouble with plastic.
Bottling Supplies
- Bottling bucket. Another 5-gallon bucket, but this one has a hole in the bottom for a spigot attachment, which allows for easy bottling. If you buy in a kit, this bucket rarely even comes with a lid, as it’s truly only used for a couple hours of bottling.
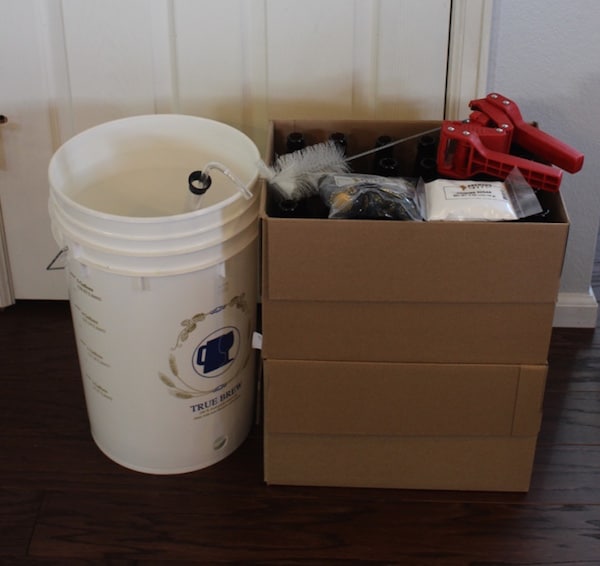
- Racking cane. Simply a hard plastic tube with a small filter at the tip, used for siphoning (and partially filtering) beer from the fermentor to the bottling bucket. (In the picture, it’s the tubing sticking out of the bucket.)
- Plastic tubing. Most homebrewing kits come with 4-5 feet of plastic tubing. It connects either to the racking cane when transferring, or to the spigot on the bottling bucket.
- Bottle filler. A handy little device to fill up your beer bottles. It will connect to the plastic tubing, and when pressure is applied with it to the bottom of a bottle, it fills ‘er up.
- Bottle capper. Another handy little device that allows for manual capping of bottles (the red thing that looks like a clamp in the picture).
- Bottles and caps. Most equipment kits don’t come with empty beer bottles. You can buy cases at homebrew stores on the cheap — 24 bottles for under $15 is what it usually comes to for me, and you’ll need 50-60 bottles for every 5-gallon batch. Buy yourself 3 cases to be safe. Most beer ingredient kits come with bottle caps for you. Don’t throw your bottles out — they can be cleaned, sanitized, and used again and again.
- Bottle cleaner wire brush. For cleaning/sanitizing your bottles. Wear glasses or something when using it; pulling the large brush out of the bottles creates a good amount of spray, which is unpleasant when the liquid you’re cleaning them with is a sanitizing solution. (Yes, I know from experience.)
- Priming sugar. This is corn sugar that gets boiled with water to create a solution that is put into the bottling bucket before siphoning the beer into it from the fermentor. It’s what carbonates the beer in the bottles — yeast eats it up and creates carbon dioxide, which then tries to escape but is trapped by the bottle cap and pushed back into the liquid. Priming sugar comes with your beer ingredient kit. You can use other sugars, but do some googling before you do that, as solution amounts vary.
A General Outline of Beer-Making Steps
As noted above, every kit is unique. While the base ingredients are all the same — malt extract, hops, sometimes grains and maltodextrin (which is basically a sweetener) — the amounts, techniques, order of steps, etc. are not standardized. So below I’ll walk you through a general outline of how things go both on brew day and bottling day, but again, follow the directions that come with your kit. Those will be more helpful for your specific batch.
Plan on devoting 3-4 hours of your time on brew day, and then a week or two later, another 2-3 hours for bottling.
Before Brewing
1. Assess Your Ingredient Kit and Know Your Recipe
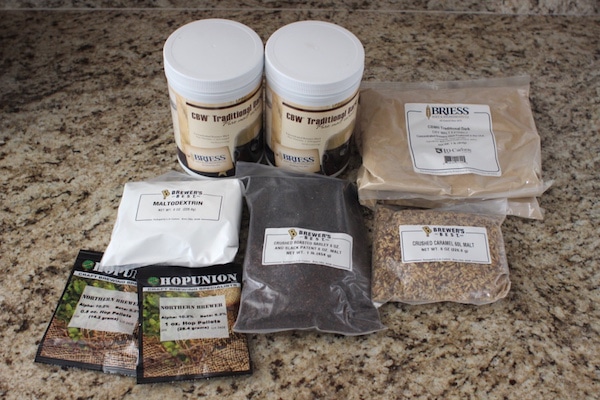
Here’s the stout kit I used. It has liquid malt extract (LME), dry malt extract (DME), grains, maltodextrin, and 2 packets of hops.
Before you get to brew day, crack open your ingredient kit and instructions and make sure you understand everything before diving in to cooking it all up. The ingredients you’ll generally see:
- Malt extract. You’ll always have malt extract — this is a concentrated version of malted grains, from which beer is made. In extract form, it removes steps that breweries and true hobbyist brewers go through to process their grain for beer-making. It comes in both liquid (called liquid malt extract or LME) and dry powder (called dry malt extract or DME) forms. Some kits use only LME, and some use a combination of LME and DME. The basic idea is that you boil this stuff for an hour or so, and that liquid becomes “wort,” which is just unfermented beer.
- Hops. All kits will have hops. There will be different varieties and amounts based on the type of beer you’re making. It comes in dissolvable pellet form.
- Bottle caps. Most kits come with 50-60 bottle caps.
- Priming sugar. Description of priming sugar is above; your kit will come with 3-5oz of this stuff. These four items (plus your instructions of course) are what’s guaranteed to be in your kit. The items below are all “sometimes” ingredients.
- Grains. Sometimes you’ll have grains included. These are to be steeped in hot water in your brew kettle before adding the malt extracts. This creates a sort of tea and adds more robust flavor to your beer.
- Spices/flavorings. If you’re making a pumpkin beer or any other kind of spiced brew, you’ll often have a packet of spices to be added in.
- Maltodextrin. This is an additive which adds fullness to your beer — a weightier “mouthfeel” in snooty beer-tasting parlance. I’ve made probably 5 batches of beer over the years, and this has only been included in a kit once.
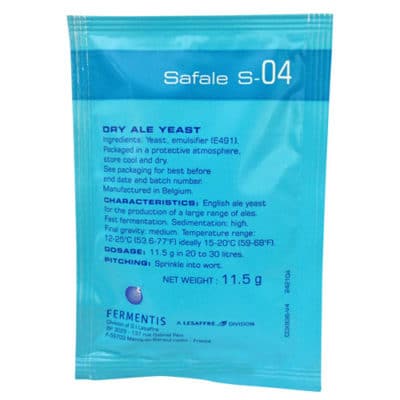
2. Get Yourself Fresh Yeast
There are volumes dedicated to homebrewing and yeast (of which I’ve not read), but I’ll try to simplify things for our purposes. Yeast is what turns your liquid (or wort) into beer. It creates alcohol by converting sugar (found in your extract) into both CO2 and ethanol — or alcohol. At the most basic level, it’s that simple.
So of course your beer kit comes with a packet of yeast. The problem is that yeast is a finicky organism. It needs to be really fresh to do its thing — the fresher the better. When you walk into a homebrew store, the yeast is refrigerated. Freshness galore! With a kit though, while it may have been refrigerated before being shipped, you just never know. Jim Koch, founder and brewer of Sam Adams beer had this to say when I asked him about the yeast found in kits:
“Yeast is a living organism. In a homebrew store and at our brewery you’ll find it refrigerated and used within a specific timeframe. In a homebrew kit, the yeast may have been under heat and packaged for a very long time, which is not ideal. If it’s not cared for correctly, it won’t do its job.”
It’s always just a safe bet to ditch the yeast that came with the kit, and go get yourself some fresh stuff from the homebrew store. (If that’s an option, of course. Sometimes it isn’t, and that’s okay. I’ve made good beer with the yeast that came in a kit.) Ask the proprietor (or a homebrew forum) what type of yeast they recommend and how much. My latest kit came with a single packet, but the homebrew store fella told me to use 1.5-2 packets since I was making an imperial brew (imperial = more alcohol; more yeast = more alcohol).
If you have questions about yeast, the internet is your friend. There are homebrew forums galore, and plenty of guys who’d be willing to help out a newbie in need.
On Brewing Day
1. Sanitize, Sanitize, Sanitize
Koch told me this was the single most important step in making great beer:
“Always be a fanatic when it comes to sanitizing your equipment. Cleanliness is next to godliness. Nothing will ruin a homebrew quicker than brewing equipment that’s not properly sanitized or a bottle that’s not entirely clean.”
Clean equipment is your number one priority when brewing. If any germs or bacteria get into your wort, your beer will be fouled beyond repair. It’ll become sour, and not in the trendy way.
Every piece of equipment that touches your ingredients needs to be sanitized — kettle, buckets, all plastic tubing parts, all your bottles, bottle caps, stirring spoons, etc.
Be wary of any scratches in your equipment. Bacteria can make their home in scratches, and as Aaron and Branden from Black Shirt told me, it would take cleaning supplies that can’t be legally bought by home consumers to get it out. If something is scratched, best to replace it. (This also means you need to be careful with your equipment!)
Many folks will think of a bleach solution rather than buying a specialty brewing sanitizer; that can be okay, but bleach can seep into plastic’s pores, leading to off flavors in your beer. Best to use a cleaner made for homebrewing.
Beyond cleaning at the start of brew day (and bottling day!), make sure to clean your equipment again when you’re all done, just so things don’t get gunked up and extra dirty before you brew again. Sanitizing isn’t necessary at the end; a good soapy wipe down will do the trick.
2. Boil
In any recipe, you’ll start by boiling a large amount of water — 2-3 gallons. This takes a long time to do, so be patient. We’re talking 30-45 minutes depending on your heat source — on the longer end if using an electric stove. When your water comes to a boil, you’ll add your ingredients. (In some recipes, you’ll steep grains before you hit boiling — to repeat, your recipe is king.)
3. Add Ingredients
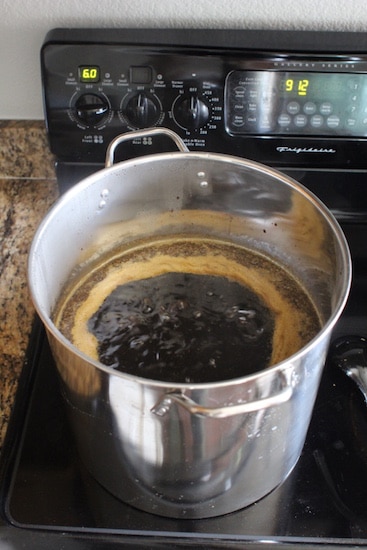
When you have a decent slow-rolling boil going, you’ll add your ingredients. Depending on your recipe, you’ll add things all at once or in increments. You’ll have things going in a slow boil for 1-2 hours before transferring the liquid into your fermentor bucket. Feel free to give it a taste at this point. It’s fun to see how it transforms into beer over the course of a few steps and a couple weeks!
4. Transfer, Cool, and Pitch Yeast
After the time specified by your recipe, you’ll pour your wort into your sanitized fermentor bucket, along with fresh water that will get the total amount of liquid to 5 gallons. Before doing so though, you’ll often cool that wort, as it needs to be below 80 degrees F in order to add your yeast (called “pitching”). This can be done with a combination of an ice bath for your brew kettle, adding cold water to the fermentor bucket, and using a device called a wort chiller. When I brew, I put the kettle into an ice bath in the sink for 10-15 minutes, pour it into the fermentor bucket, and add cool water. That usually gets me in the right range to add the yeast.
Once you’ve done that, you’ll pop the lid and airlock on, then put the bucket in a cool place for a week or two. Refer to your instructions for how to tell if your brew-in-the-making is healthy (usually means seeing bubbles in the airlock within 24-48 hours, and for a period of time after that).
On Bottling Day
1. Sanitize!
See above. Bottles, caps, all tubing, etc.
2. Transfer Beer to Bottling Bucket
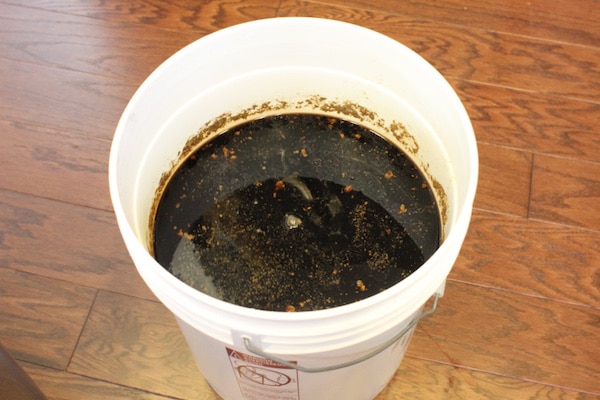
This is what your brew will look like when you crack the lid after a week or two. Don’t worry, that’s just dead yeast (a good thing). It first congregates at the top to get its work done, then largely settles at the bottom. Some of it remains floating at the top though. The first time I brewed, this scene freaked me out — I thought my beer was done for!
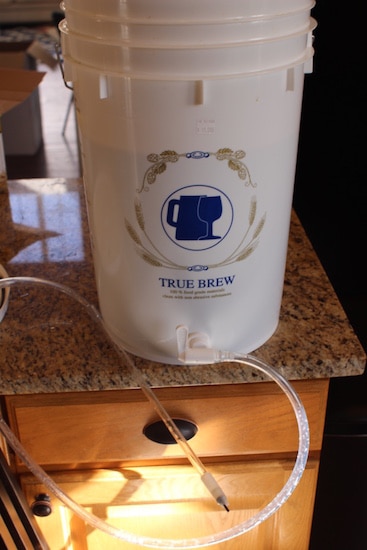
Crack open your fermentor bucket, and don’t be alarmed. See the above photo and caption. Hoist the bucket up onto a countertop, and using your racking cane and tubing, transfer the beer to your bottling bucket. (The racking cane is pumped in order to begin the siphoning.) The built-in filter on the racking cane keeps the muck from getting into the bottling bucket.
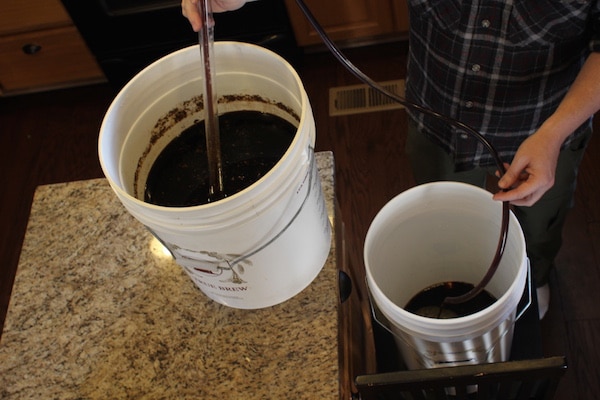
Transferring beer to the bottling bucket.
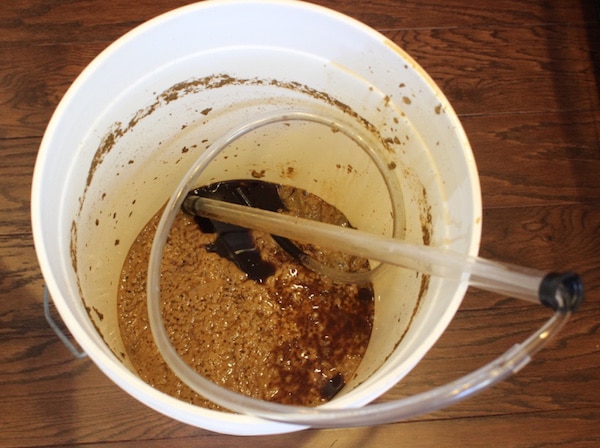
What’s left at the bottom of your fermentor bucket. It looks gross — it’s just dead yeast. A good sign. Don’t dump this in your kitchen sink — out in the yard is fine.
3. Attach Bottle Filler and Fill Your Bottles With Beer
Spigot with plastic tubing attached, and bottle filler attached at the end. The little black tip, when pressed to the bottom of a bottle, releases beer into the glass.
Attach your tubing and bottle filler, and get to work loading up your bottles with that tasty brew! Have towels handy (either cloth or paper), as this step can get a little messy.
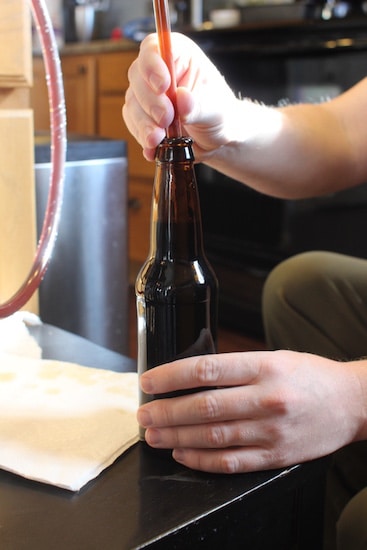
Don’t worry, I’m still married, I just don’t wear my ring when brewing.
4. Cap Your Bottles and Store ‘Em
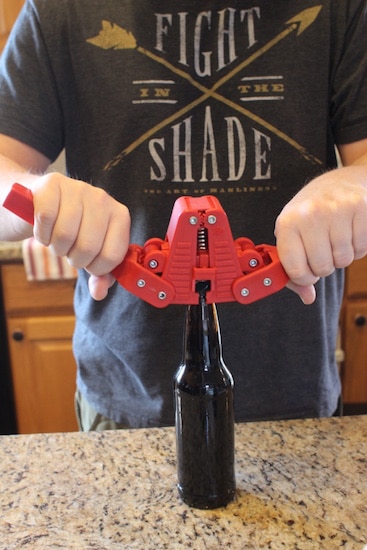
After filling 50-60 bottles or so, use your handy dandy capper to seal each bottle for conditioning (remember, that’s how your beer is carbonated). Store your freshly bottled and capped beer in a cool place for about two weeks, and you’ll be all set with a delicious, homemade beverage!
After Brewing, Bottling, and Tasting
1. Get Feedback
Both Koch and the Black Shirt guys said this step was just as important as any other if you truly want to make good beer. If something is off in your beverage, you’ll have virtually no way of knowing why without the experience of other brewers providing you feedback. I’ve made a batch of beer that just didn’t taste good, and since I didn’t share it with any other homebrewers, to this day I don’t know what happened or what could have corrected it.
And even if your beer is good, you won’t really know how to make it better on your own. I’ve had this experience as well, making some batches of good beer, but not really great beer.
Our nation (and world) is filled with homebrew clubs that are eager to try your brew and offer helpful criticisms. As Koch told me, “find your Yoda.” They’re a forgiving group of people because they’ve made all the same mistakes you have.
2. Share With Friends!
Part of the fun of homebrewing is sharing your creation with friends and family. Bring a six-pack to a dinner party as a gift for the host, contribute a case to a holiday BBQ, and invite your neighbors to taste and critique your brew. Beer is best enjoyed with friends, and doubly so when it’s homemade!
____________
Sources
Big thanks to Jim Koch, founder of Boston Beer Co. — the legendary founder and brewer of Sam Adams beer — as well as Aaron Holstad and Branden Miller at Black Shirt Brewing here in Denver, for their help and guidance with this article.
The Complete Joy of Homebrewing by Charlie Papazian — Jim Koch’s bible and go-to resource
Brew by James Morton