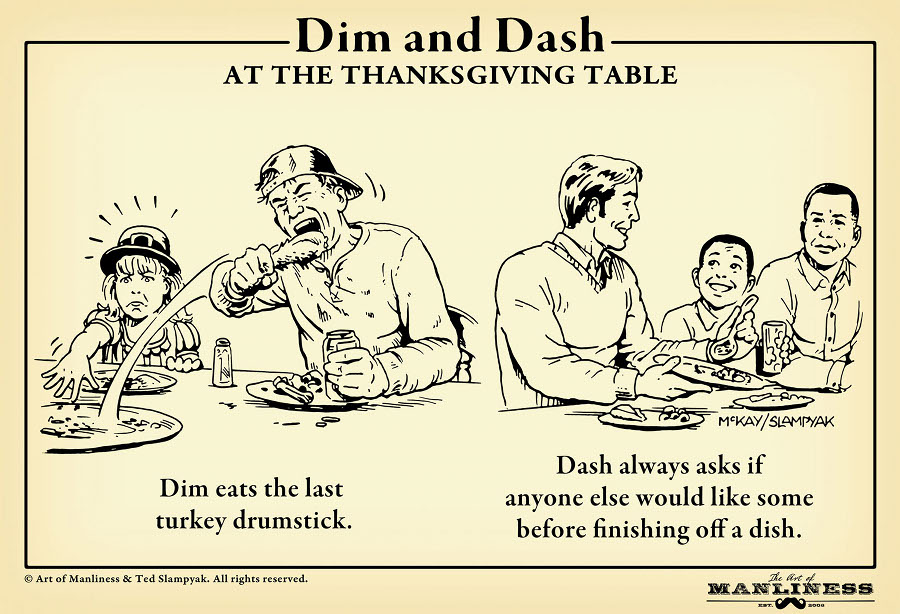
Editor’s Note: This is a guest post from Pete Sveen. It originally appeared on his website, diypete.com.
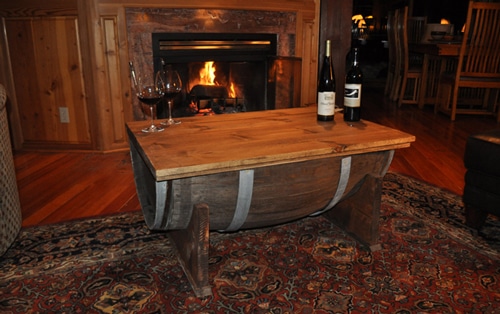
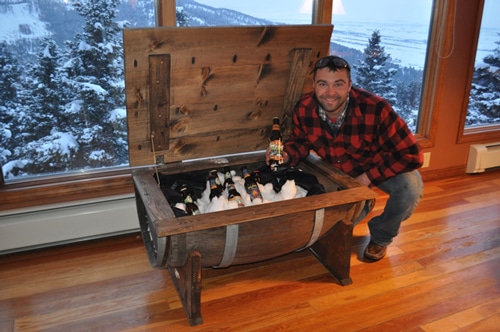
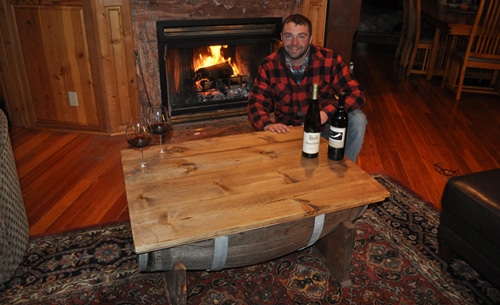
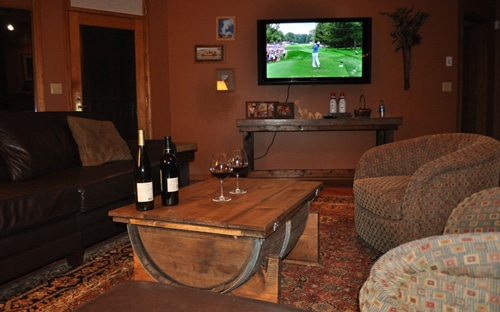
A while back, a buddy of mine came across a few old whiskey barrels and called to tell me we had to do a project with them. So, we pondered a few ideas and decided to make a whiskey barrel coffee table. After a little more brainstorming we came up with the idea to add hinges so we could use the barrel for storage as well. Turns out the barrel can hold quite a few ice cold beverages! Hence, we finished the project just in time for the Super Bowl and it was quite a hit with both the guys and the gals. And now I’d like to share that project with you!
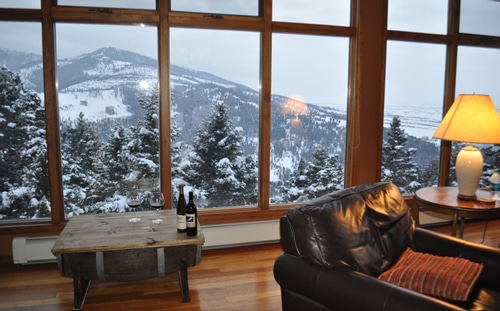
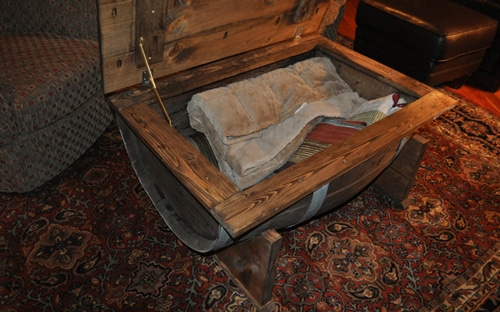
I didn’t have any luck finding plans to go off, so we came up with our own and documented the entire process so you can easily create your own whiskey or wine barrel coffee table. This table is sure to be a conversation starter and will get compliments left and right. In addition to acting as a cooler, this functional table can be used to store blankets, pillows, firewood, and other household items.
In this tutorial you’ll find out what tools are needed, where to source a barrel, and how to turn that old worn-out barrel into the coolest piece of furniture in your home (or out on the patio!). Also, we’ve included an instructional video of the entire process at the bottom of the post.
Note: Your specific measurements may vary, depending on the size of the barrel you use. Be sure to make your own measurements based on these instructions before embarking on your own.
Non-Lumber Supplies
- Whiskey barrel – between $25 and $200 depending on its condition and where you find it
- Wood screws – 3-inch (~10 screws), 1 1/2-inch (15-20), and 1-inch (~15)
- Kreg Jig screws – 1 1/4-inch (1 box) to connect tabletop boards and frame
- Wood stain – I used a stain from Minwax called “Special Walnut”
- Polyurethane (Minwax) – to help protect the tabletop
- 2 chest hinges
- 1 chest lid support
- 120- and/or 220-grit sandpaper
- Level
- Tape measure
Lumber List
- One 2×12, length: 6 feet (used for table base)
- One 1×4, length: 10 feet (used for table apron)
- Two 1×8, length: 8 feet (used for tabletop)
- One 1×3 or 1×2, length: 6 feet (used for decorative base pieces)
Tools Needed
- Miter saw – a hand saw would work, but a miter saw will make it quicker
- Kreg Jig – used for attaching the tabletop boards to each other
- Jig saw – used to cut the arch for the base and could be used to cut a full barrel in half
- Reciprocating saw – used to cut the metal bands if you are splitting a full barrel in half
- Circular saw (optional)
- Drill
- Orbital sander
- Clamps
- Pry bar and rubber mallet – used to remove the metal bands and to even out the boards
Where to Find a Whiskey or Wine Barrel

The first step to building the table is finding a whiskey or wine barrel for the project. You have a few different options for sourcing barrels. First, I’d call around to local whiskey distilleries and/or vineyards in your area to see if they are looking to sell or recycle old inventory. The next idea is to check Craigslist by searching for both wine barrels and whiskey barrels. I was lucky enough to find a very nice businessman in my hometown in Montana who was looking to get rid of a few things, including barrels. They needed a new home and went to good use! Home and garden stores also carry barrels from time to time, which are commonly marketed as planters.
If you don’t have any luck locally, I’d recommend ordering a used barrel from Amazon or eBay. They are going to be somewhat expensive, however, and shipping can be as high as $100! If you aren’t in a huge hurry, I’d say to watch Craigslist for a few weeks. You can even do a wanted ad telling people you are trying to find an old barrel to use for a furniture project. You might be surprised at your results.
I bought as many barrels as the local guy would sell me. The half barrels were $25 each and the whole barrel was $100.
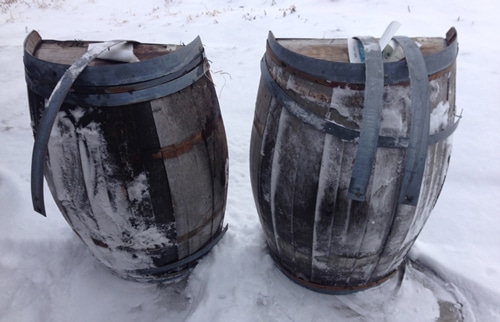
Here is a look at the barrels that had already been split and were meant to be used as planters. They had been sitting outside for a number of years, but I felt like the weathering added a lot of character. I used the pre-cut half-barrel for my project, so I do not show the process of cutting a full barrel in half. However, you can do so by cutting the bands with a reciprocating saw and using a jigsaw to cut through the wood. Often-times the length of the barrel can be split on a seam and won’t require making a cut.
1. Disassemble Barrel
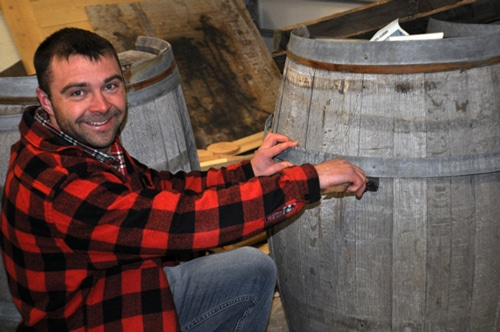
The first step is to remove the metal bands using a pry bar. The bands are held with small nails and should pop off pretty easily. Leave the end bands in place to keep the barrel together.
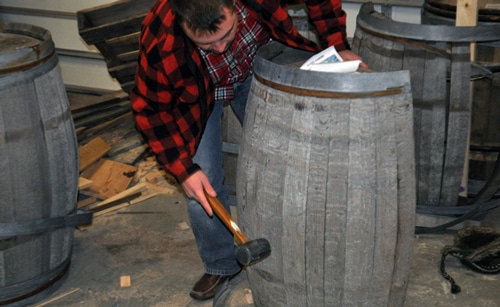
Next, use a rubber mallet to even out the boards as best as possible. Some of the boards may go a little out of place after removing the bands and this process will help flush them up again.
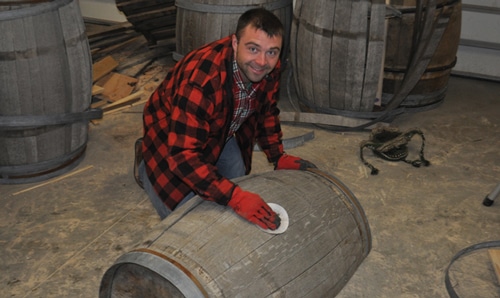
Use 120- or 220-grit sandpaper to lightly go over the outside of your barrel. I used 220-grit because I didn’t want to remove any of the character of the weathered wood.
2. Stain the Barrel
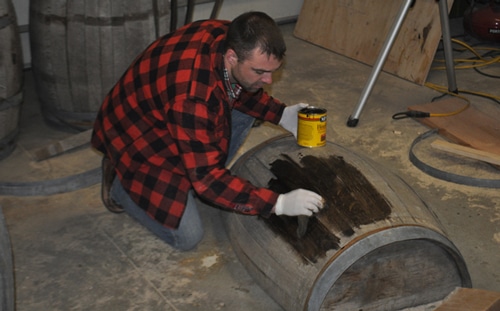
The staining process will give your barrel a brand new look in record speed. I wiped on one coat of a dark-colored stain from Minwax called “Special Walnut.”
3. Reassemble
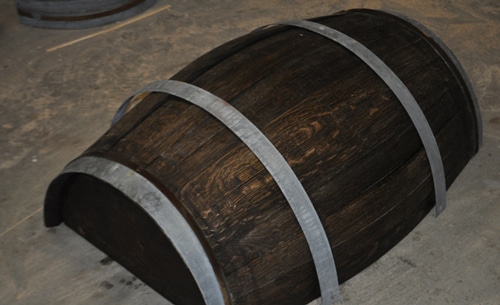
Let the stain dry for a while and then reattach the metal bands. Line up the holes in the metal with the old nail holes in the wood to ensure they are in the same orientation.
Use 1-inch wood screws to reattach the metal bands.
4. Build the Table Bases
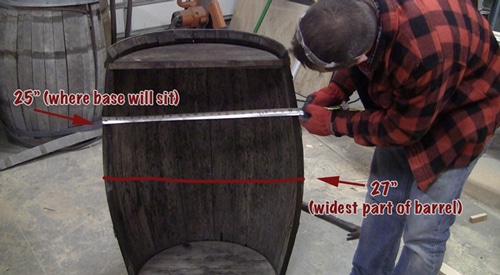
The next step is to create two table bases out of the 2×12 board. I’d recommend cutting each base piece the same width as the widest part of the barrel. I cut my boards at 27 inches.
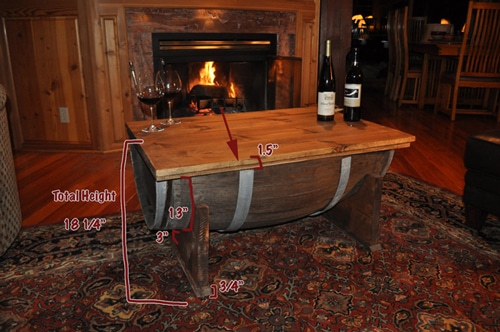
Now we get to cut the arc in the 2×12 board to give the barrel a place to sit. This is one of the more complex parts of the project simply because we want to get a somewhat snug fit between the barrel and the base. I explain and show the process in the video tutorial (at the bottom of the post) as well so check that out if you have any other questions about this step. If you look at the photo below you can see the depth of the barrel where the base attaches is 13 inches. The barrel width at that point is 25 inches.
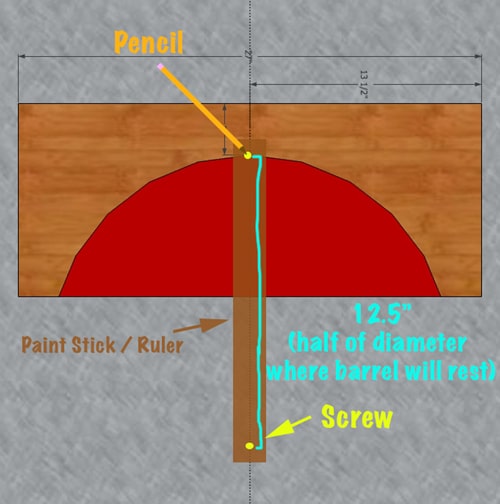
Put a mark at 13.5 inches (halfway) on the 27-inch-long 2×12. (The precise measurement may vary based on the size of your barrel. The key point is that it’s halfway, lengthwise.) I put the mark 3 inches down from the top of the board, intersecting with the center point as shown in the drawing above. Take the width of the barrel where the base will sit (25 inches in my case), and divide by two to get 12.5″. Take a paint stick and drill one small hole near the top. Line the hole up with the mark you created earlier. Measure 12.5 inches down from that hole and drill another small hole. This small hole will serve as the pivot point. You’ll want to put a tack or screw in (into scrap wood) to allow the paint stick to pivot. The top hole will be used for a pencil, in order to draw your curved line. (Check out the video to see more details.)
To reiterate, I used the paint stick as a compass. You will use a pencil in the top hole to draw the arc. The bottom hole is a pivot point and should be secured to a piece of scrap wood (in my case, a scrap piece of 2×12) using a screw or tack.
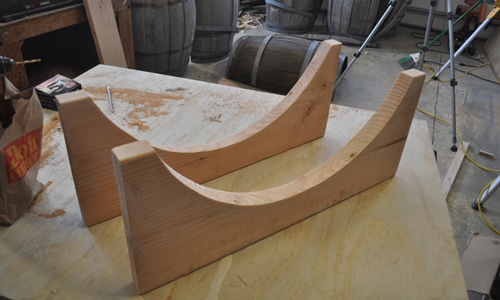
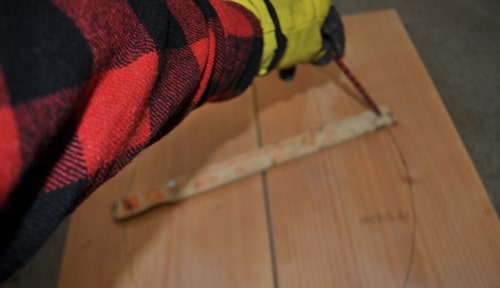
Oofda! We are finally done with the arc measurements. It’s honestly pretty simple, but explaining it can be somewhat tricky. You’ll do this step twice, using a jigsaw to cut the arcs on the 2×12 bases. Once cut, use an orbital sander or an angle grinder with a flap disk to smooth things out. The angle grinder helps take away wood very quickly and can be used to carve the perfect fit for your barrel.
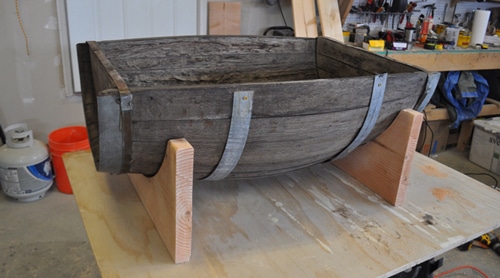
Test the barrel on your base to check the fit. Use a level and tape measure to make sure the barrel sits evenly. Make adjustments as needed.
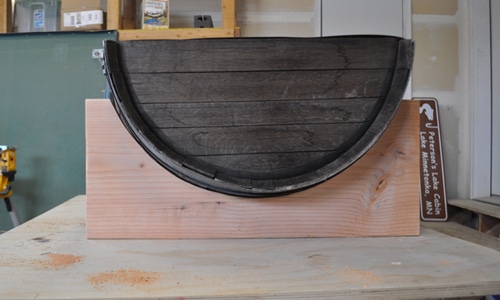
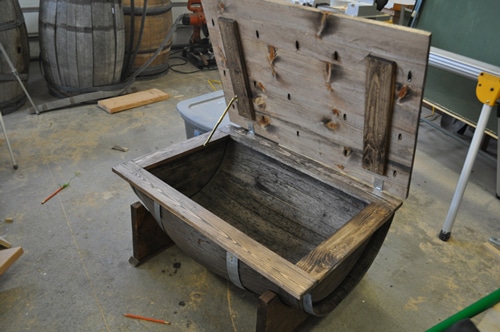
Here is a look at the barrel resting in your new base. It should fit nice and snug.

Stain the base pieces using a rag. I’ve found microfiber towels work very well for this.
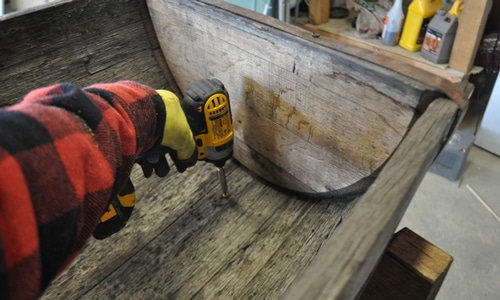
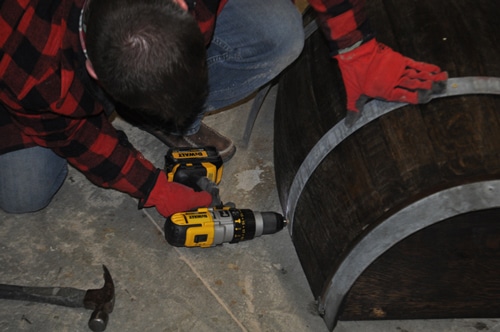
Drill pilot holes through the barrel and into the base. This will prevent the wood from splitting. Then attach the barrel to the base using 3-inch wood screws. I used 3 to 4 screws for each base.
5. Construct the Table Apron
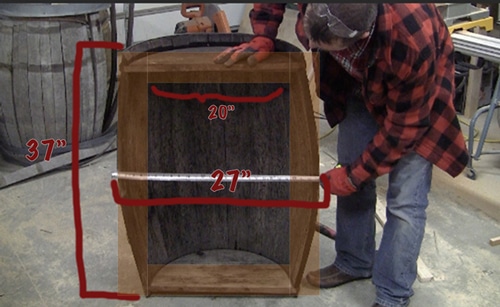
Build an apron around the top of the barrel using 1×4 lumber. The length of my barrel was 37 inches, so I cut two pieces to that length. Notice the outside of the 1×4 sits flush with the widest part of the barrel. Cut two smaller pieces for the sides; mine turned out to be 20 inches in length.
Attach the 1×4 boards to each other to form a frame. I used a Kreg Jig for this process and drilled 2 pocket holes on the ends of each short board, creating a total of 8 pocket holes. Use 1 1/4-inch Kreg screws to attach the boards.
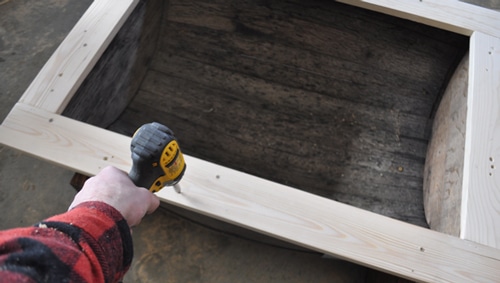
Center the frame on the barrel and attach with 1 1/2-inch wood screws. Don’t forget to pre-drill pilot holes so the wood doesn’t split!
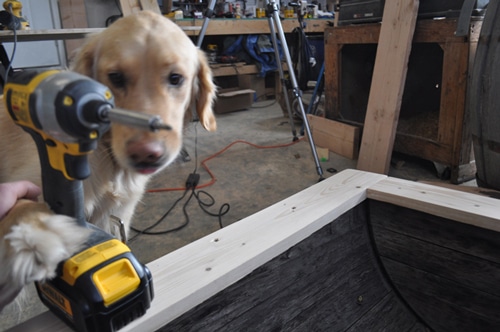
It’s always good to have a helper out in the shop. I taught Nala how to use an impact wrench. Such a good dog!
6. Make and Attach Decorative Base Pieces
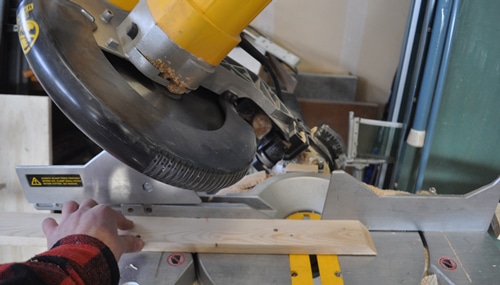
Use a 1×2 or 1×3 board to create feet for the base. Cut them 2 inches longer than the 2×12. Since my 2×12 was 27 inches, I cut the feet to 29 inches and then beveled each end to 45 degrees.

Attach the feet using 1 1/2-inch wood screws or an air nailer.
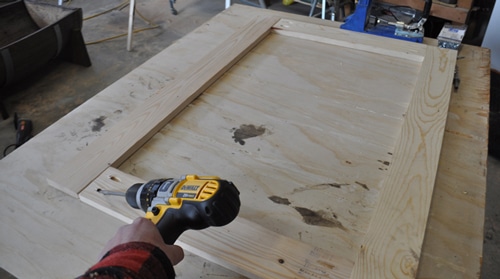
7. Assemble the Tabletop
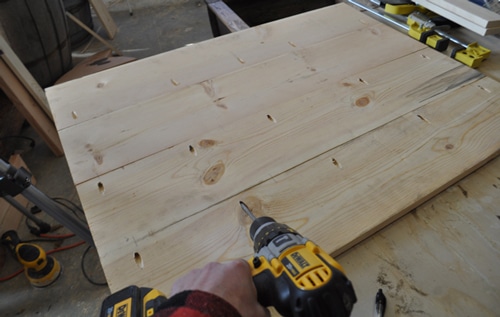
It’s time to make your tabletop! My whiskey barrel was 37 inches in length, so I decided to cut the top boards to 38 inches. The extra inch allows the tabletop to overlap the base and give you a lip on each side. The lip makes it easier to open and close. Cut a total of four 1×8 boards for your top. Next, drill pocket holes every 6 to 10 inches. Attach the boards to each other using 1 1/4-inch Kreg Jig screws.
8. Attach Hinges and Lid Support
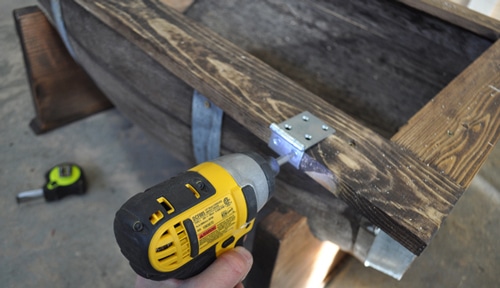
Attach 2 chest hinges to the outside frame. Use the screws provided with the hinge.
Connect the lid support between the frame and lid.
Final Tips
Finish staining the boards you haven’t coated yet, then apply polyurethane to the top. I used 3 thin coats of an oil-based polyurethane from Minwax. It gave the top a nice warm glow and protects it from spills.
Cheers! Job well done. Sit back, relax, and enjoy your new furniture.
Good luck and have fun with your whiskey barrel project!
Watch a Video Tutorial of the Project:
Pete currently lives and plays in Bozeman, Montana. In addition to all of his hobbies out in the garage, he enjoys skiing, kayaking, running, flying airplanes, and hanging out with friends and family. He runs diypete.com, and recently started a podcast to help folks learn new skills and better express their creativity. Check it out!